Announcement
Targeted at operations, publishing, review, and configuration personnel.
Updated: September 2026.
Announcement publishing workflow
All announcements, from preview to publish in the production environment, adhere to the established procedures depicted below.

| Announcement status (The current publication status) | Editing | Preview in test environment | Preview in production environment | Publish in production environment |
|---|---|---|---|---|
| Editing | Edit announcement | Preview in test environment before going offline, the status is changed to: Preview in test environment | Preview in production environment before going offline, the status is changed to: Preview in production environment | Publish in production environment before going offline, the status is changed to: Publish in production environment |
| Preview (Test Environment) | No such operation can be conducted, unable to edit before the announcement goes offline. | Preview in test environment before going offline (current status) | Preview in production environment before going offline, the status is changed to: Preview in production environment | Publish in production environment before going offline, and the status is changed to: Publish in production environment |
| Preview (Production environment) | No such operation can be conducted, unable to edit before the announcement goes offline. | No such operation can be conducted | Preview in production environment before going offline, and the status is changed to (current status) | Publish in production environment before going offline, the status is changed to: Publish in production environment |
| Publish (Production Environment) | Reviewers can modify published announcement online. | No such operation can be conducted | No such operation can be conducted | Publish in production environment before going offline (current status) |
The term "operation" refers to the operations performed on announcements through the Player Network Console, which includes editing, copying, preview in test environment, preview in production environment, publishing in production environment, and taking offline.
Preparation before use
Before creating an announcement, it is recommended to prepare the following:
| What to prepare | Example | Why it's needed |
|---|---|---|
| Admin announcement name | June version update announcement | For backend query and identification; not directly visible to players as the title |
| Announcement type | Pre-login, post-login, announcement board, or custom | Determines the announcement display location and configurable fields |
| Effective time zone and validity period | UTC+8, start and end time | Determines when the announcement takes effect and expires |
| Titles and body in each language | Chinese, English, Japanese | For displaying to players in different languages |
| Images and redirect links | JPG / PNG, event links | Used when image-text announcements are needed |
| Publish scope | Region, server, player list | Determines which players can see the announcement |
| Custom parameters | reward:diamond_200 | Used when the business or client needs to read extended parameters |
To reuse player lists, regions, servers, or announcement categories, configure them first in Announcement List → More Settings.
Understand the main pages
The left sidebar contains three main entries:
| Page | Main purpose | Common operations |
|---|---|---|
| Overview | View announcement status and publishing workflow | Click status cards to enter filtered announcement lists; create announcements; start importing |
| Announcement List | Query and manage all announcements | Create, import, edit, publish, duplicate, take offline, manage configurations, view logs |
| Announcement Review | Handle production publish or offline reviews | Approve, reject, view review history, configure reviewers |
The Chinese / EN toggle in the top right corner of the page switches the admin interface language and does not auto-translate announcement body text.
Choose the appropriate announcement type
Confirm the announcement display scenario before creating. The announcement type cannot be changed after saving; if the wrong type is selected, create a new announcement.
| Announcement type | Applicable scenario |
|---|---|
| Pre-login announcement | Maintenance, server downtime, or server opening notices that players must see before logging in |
| Post-login announcement | Operational information or reminders displayed after players successfully log in |
| Announcement board announcement | Long-term or categorized information that players actively open the bulletin board to view |
| Custom announcement | Special display scenarios that require custom images and business parameters |
Quick publish
If you are using this product for the first time, follow these 8 steps:
-
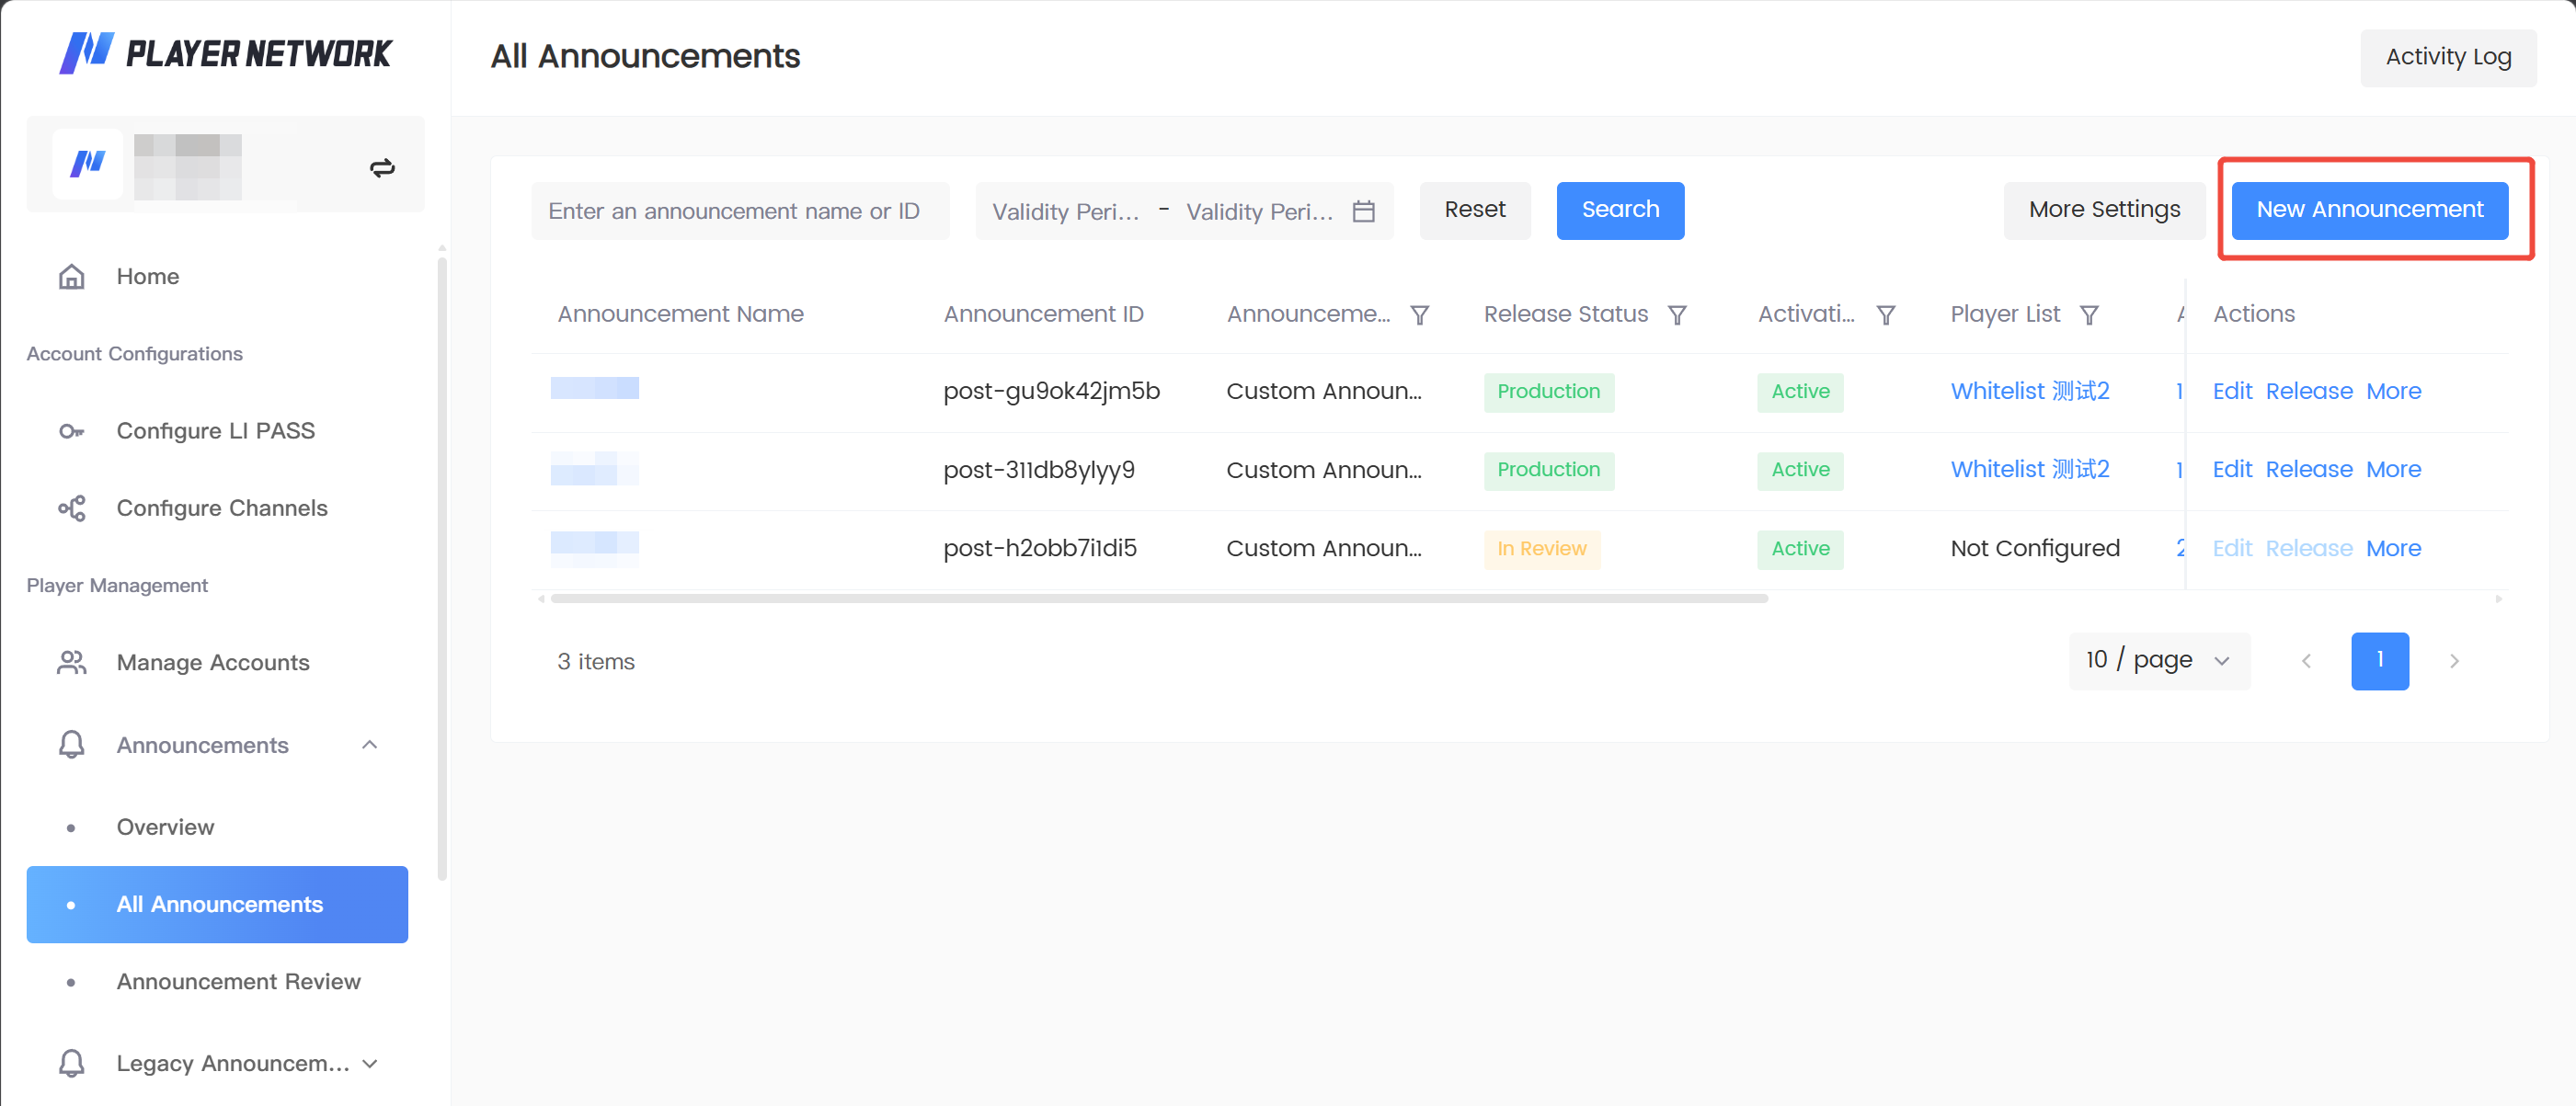
Go to Announcement List in the left sidebar.
-
Click Create Announcement in the top right corner.
-
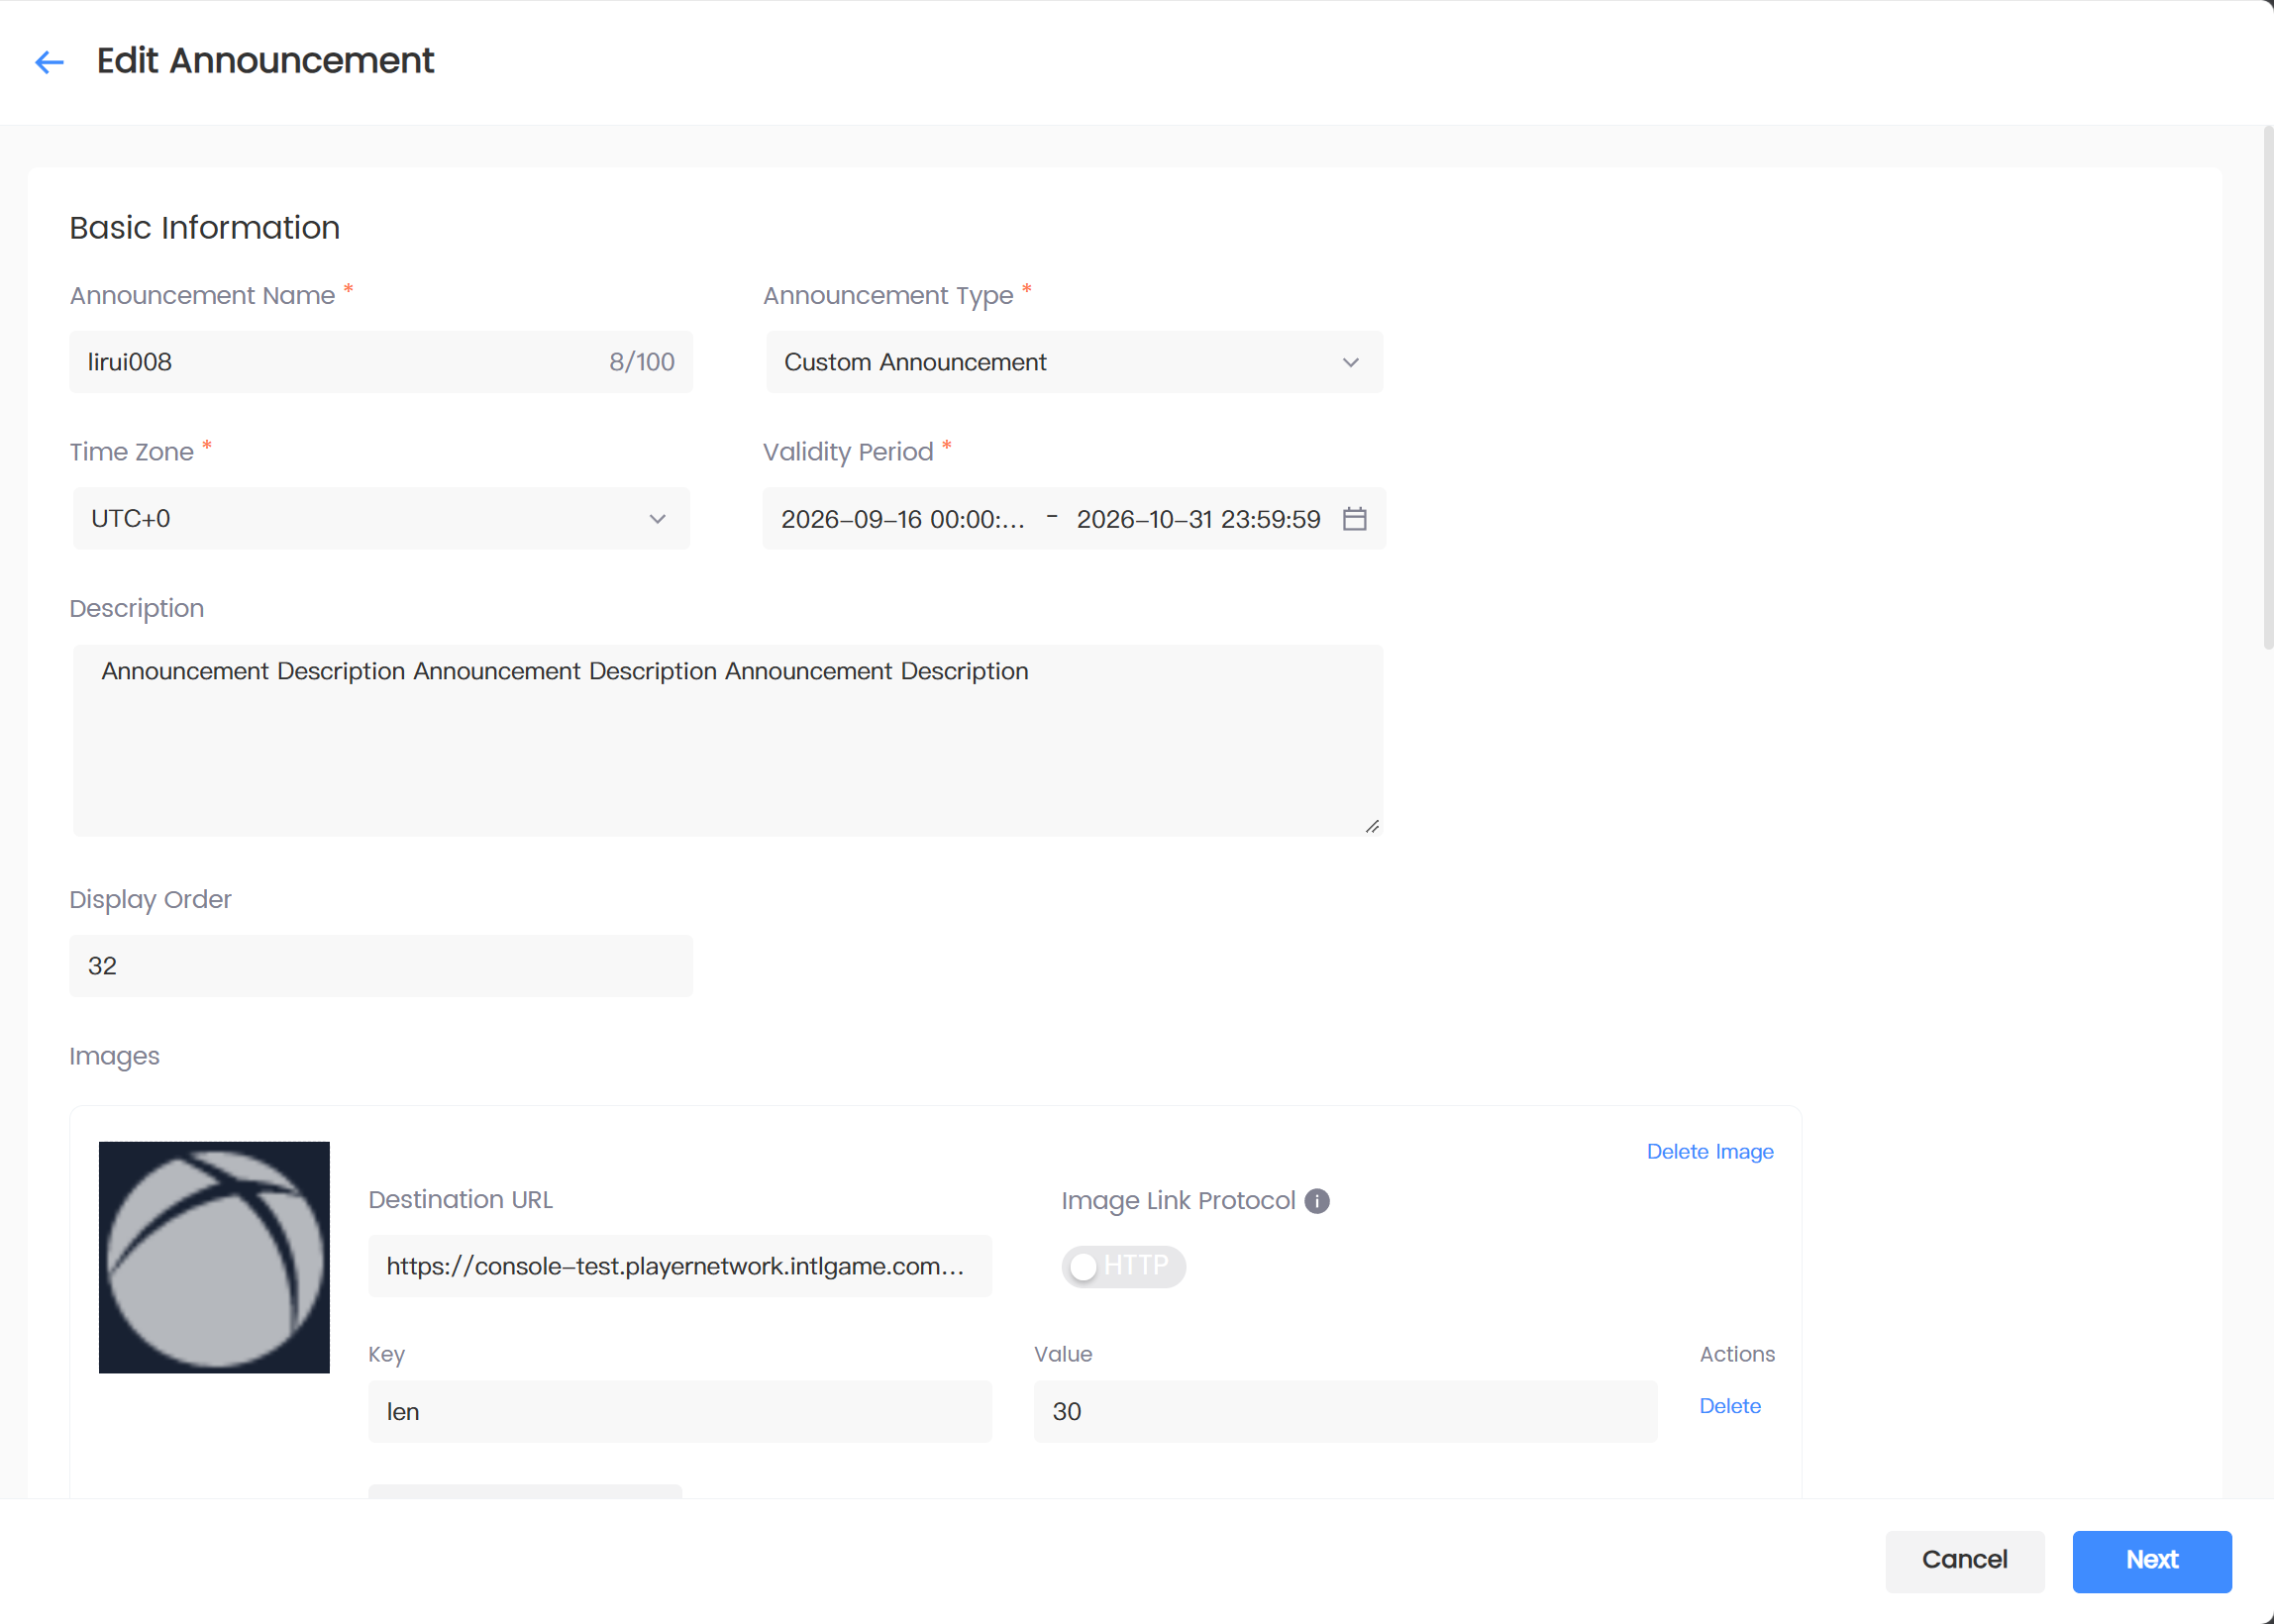
Fill in the announcement name, announcement type, time zone, and validity period.
-
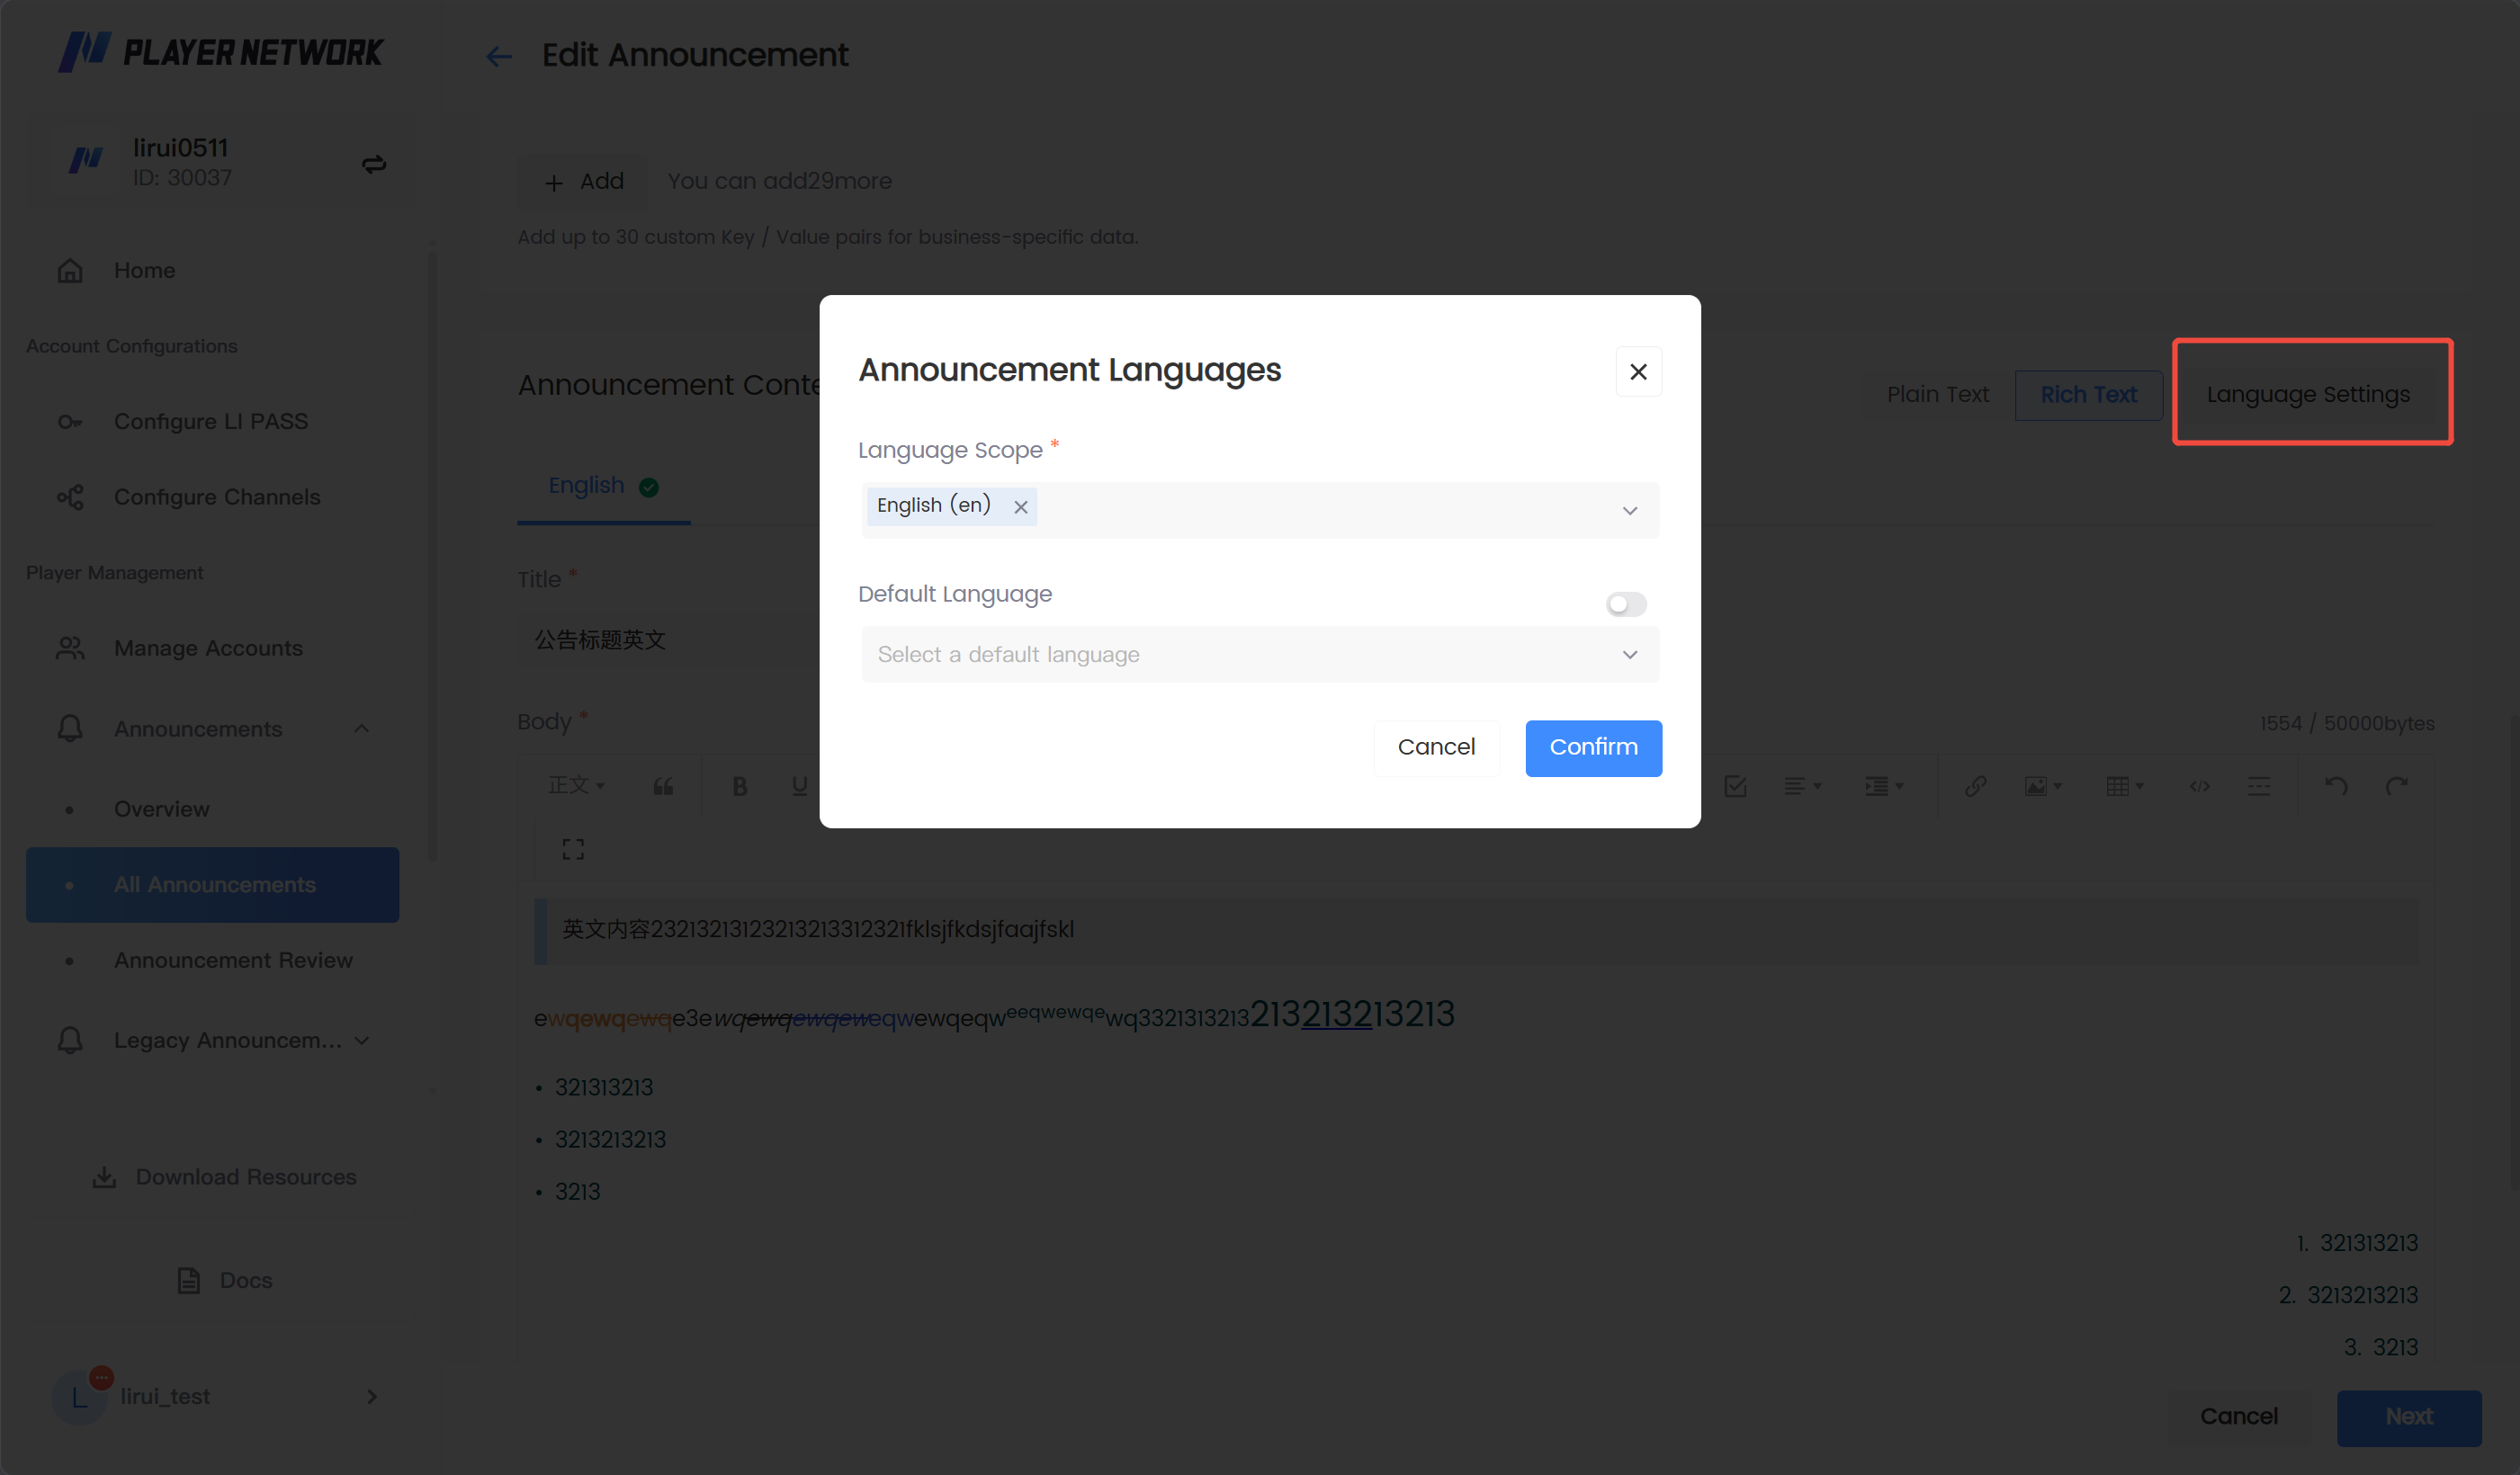
Under Announcement Content, select the language and fill in the title and body for each language.
-
To display images, add images and fill in redirect links and Key / Value as needed.
-
Click Save & Next, the announcement will be saved as Pending Publish and enter Publish Scope Settings.
-
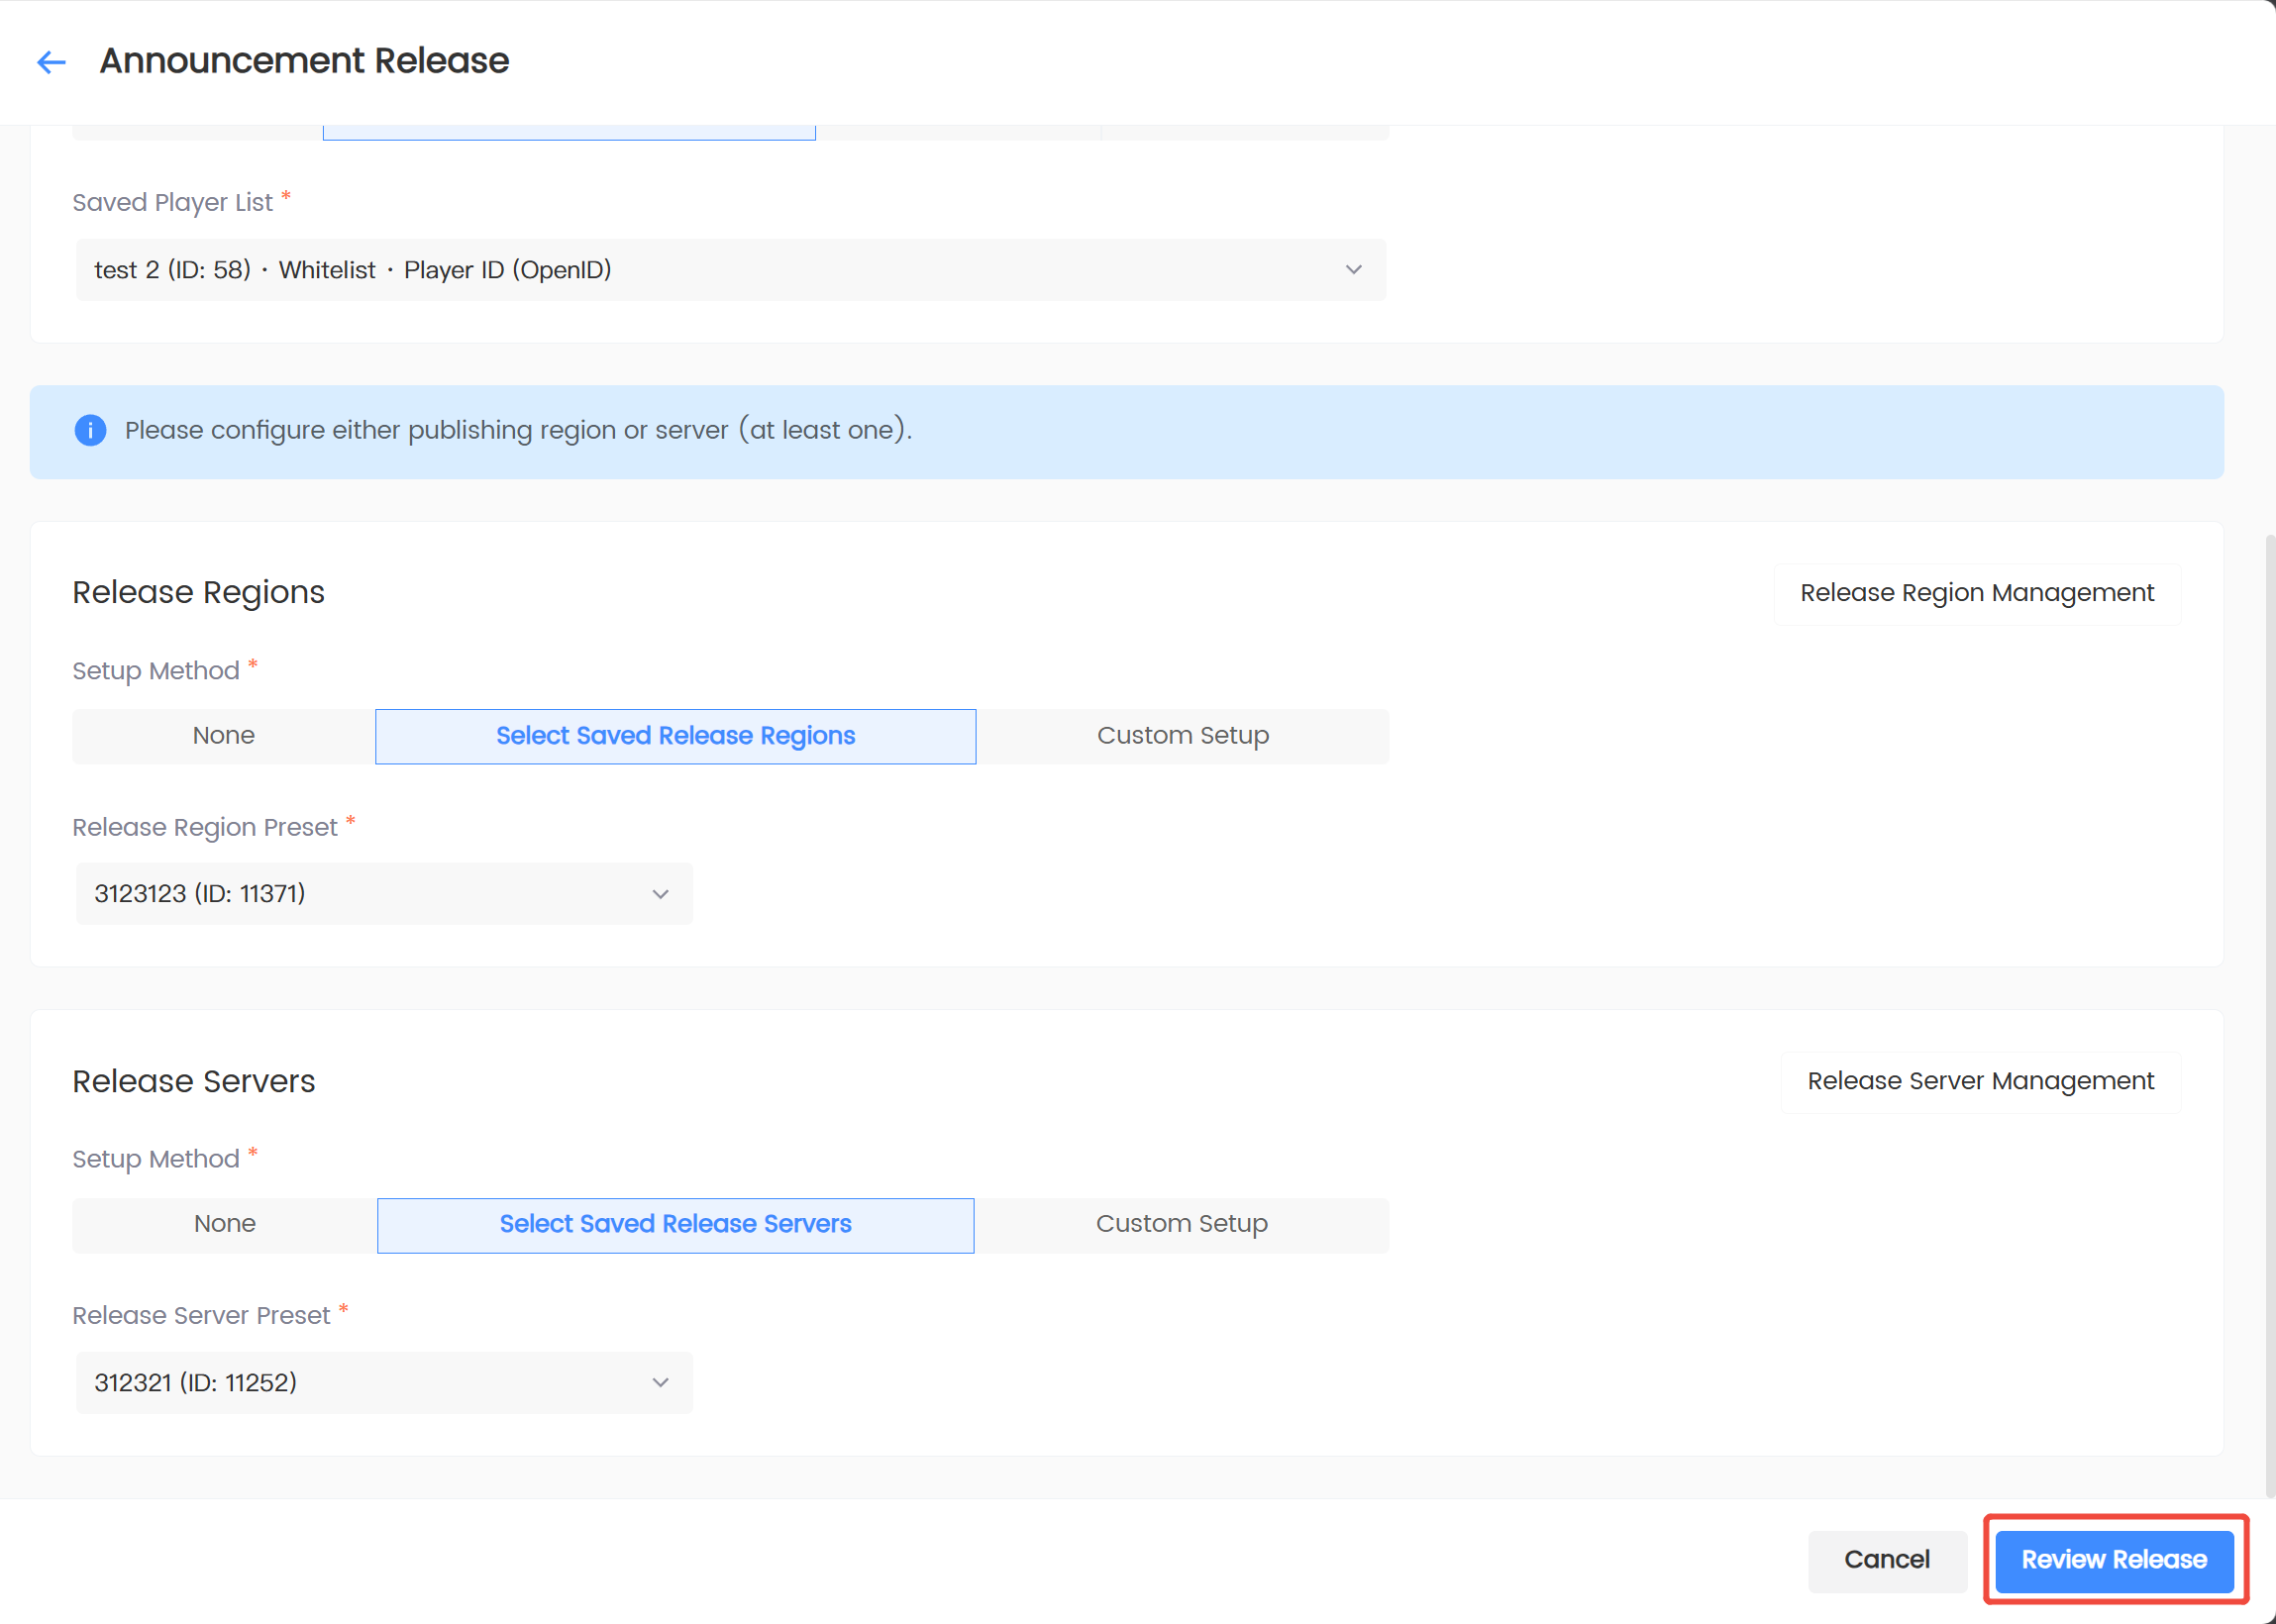
Select the test or production environment, and configure the player list, publish region, and publish server.
-
Click Confirm Publish, review the summary and submit; if approval is required, wait for the reviewer to process it.
Recommendation: For new users publishing for the first time, select Test Environment Publish to verify the content and display effect before publishing to the production environment.
Manually create announcements
Enter the new announcement page
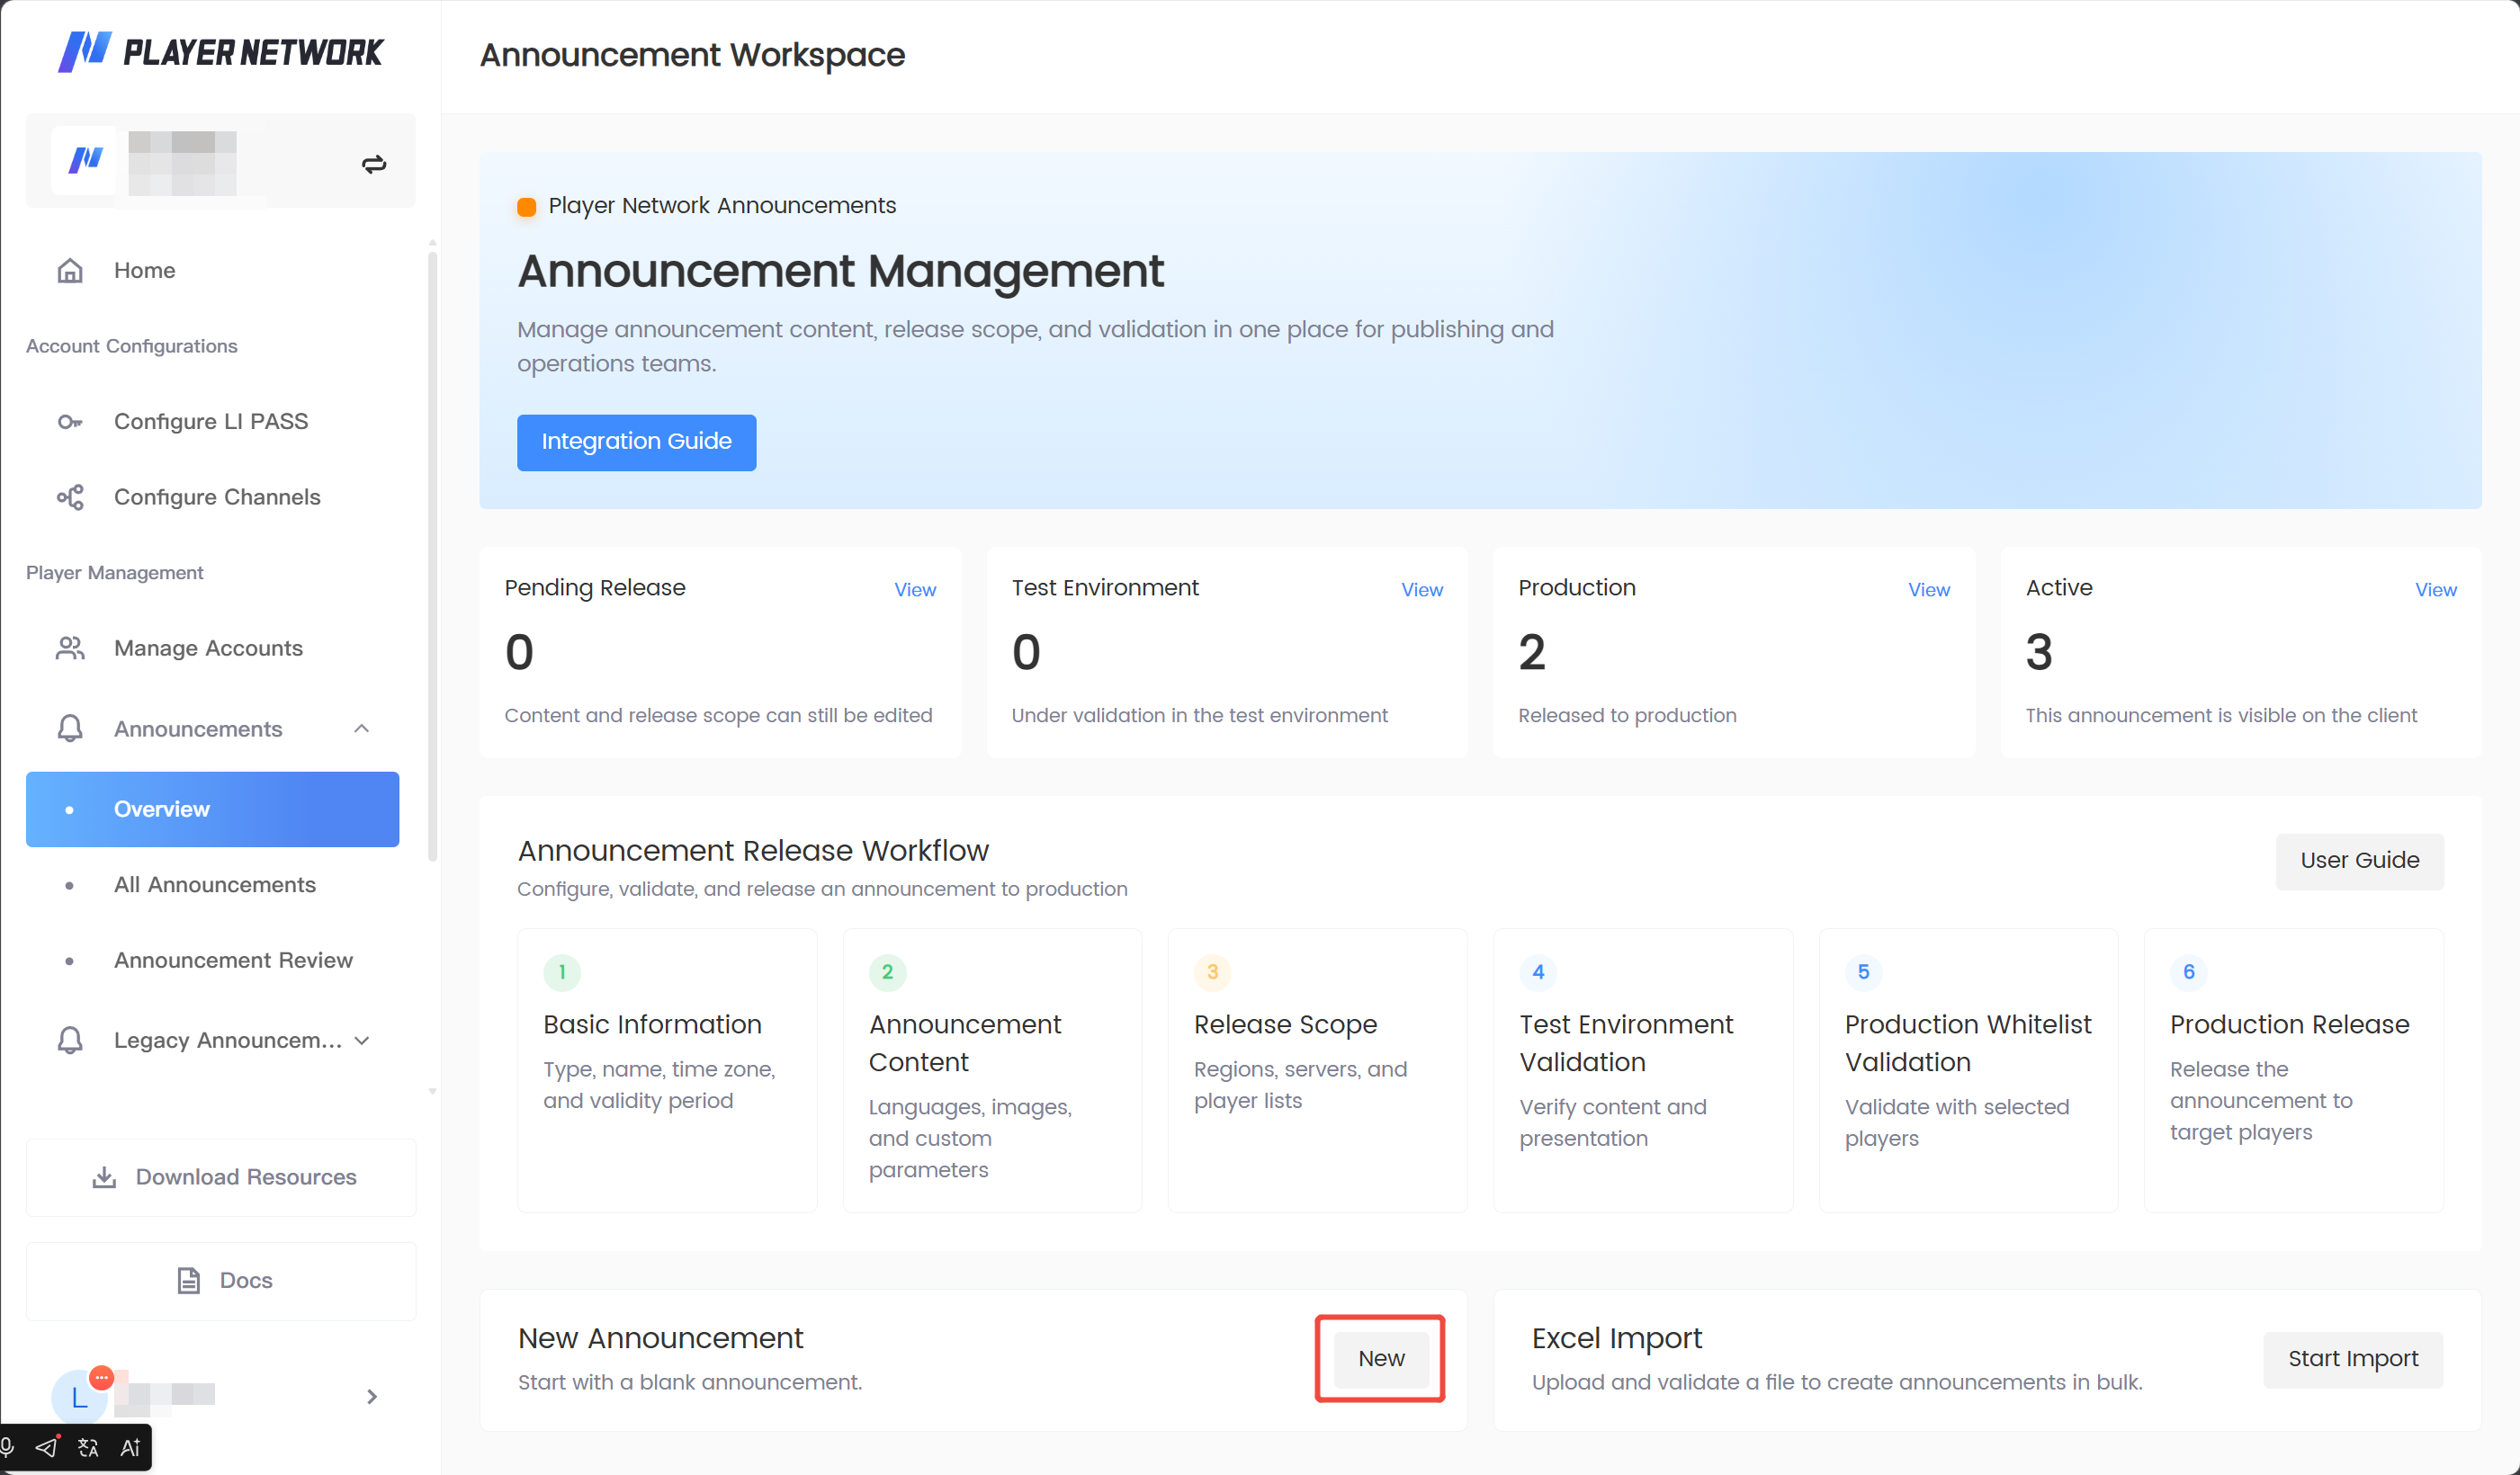
Entry 1: In the Overview, click Create in the Create Announcement area.
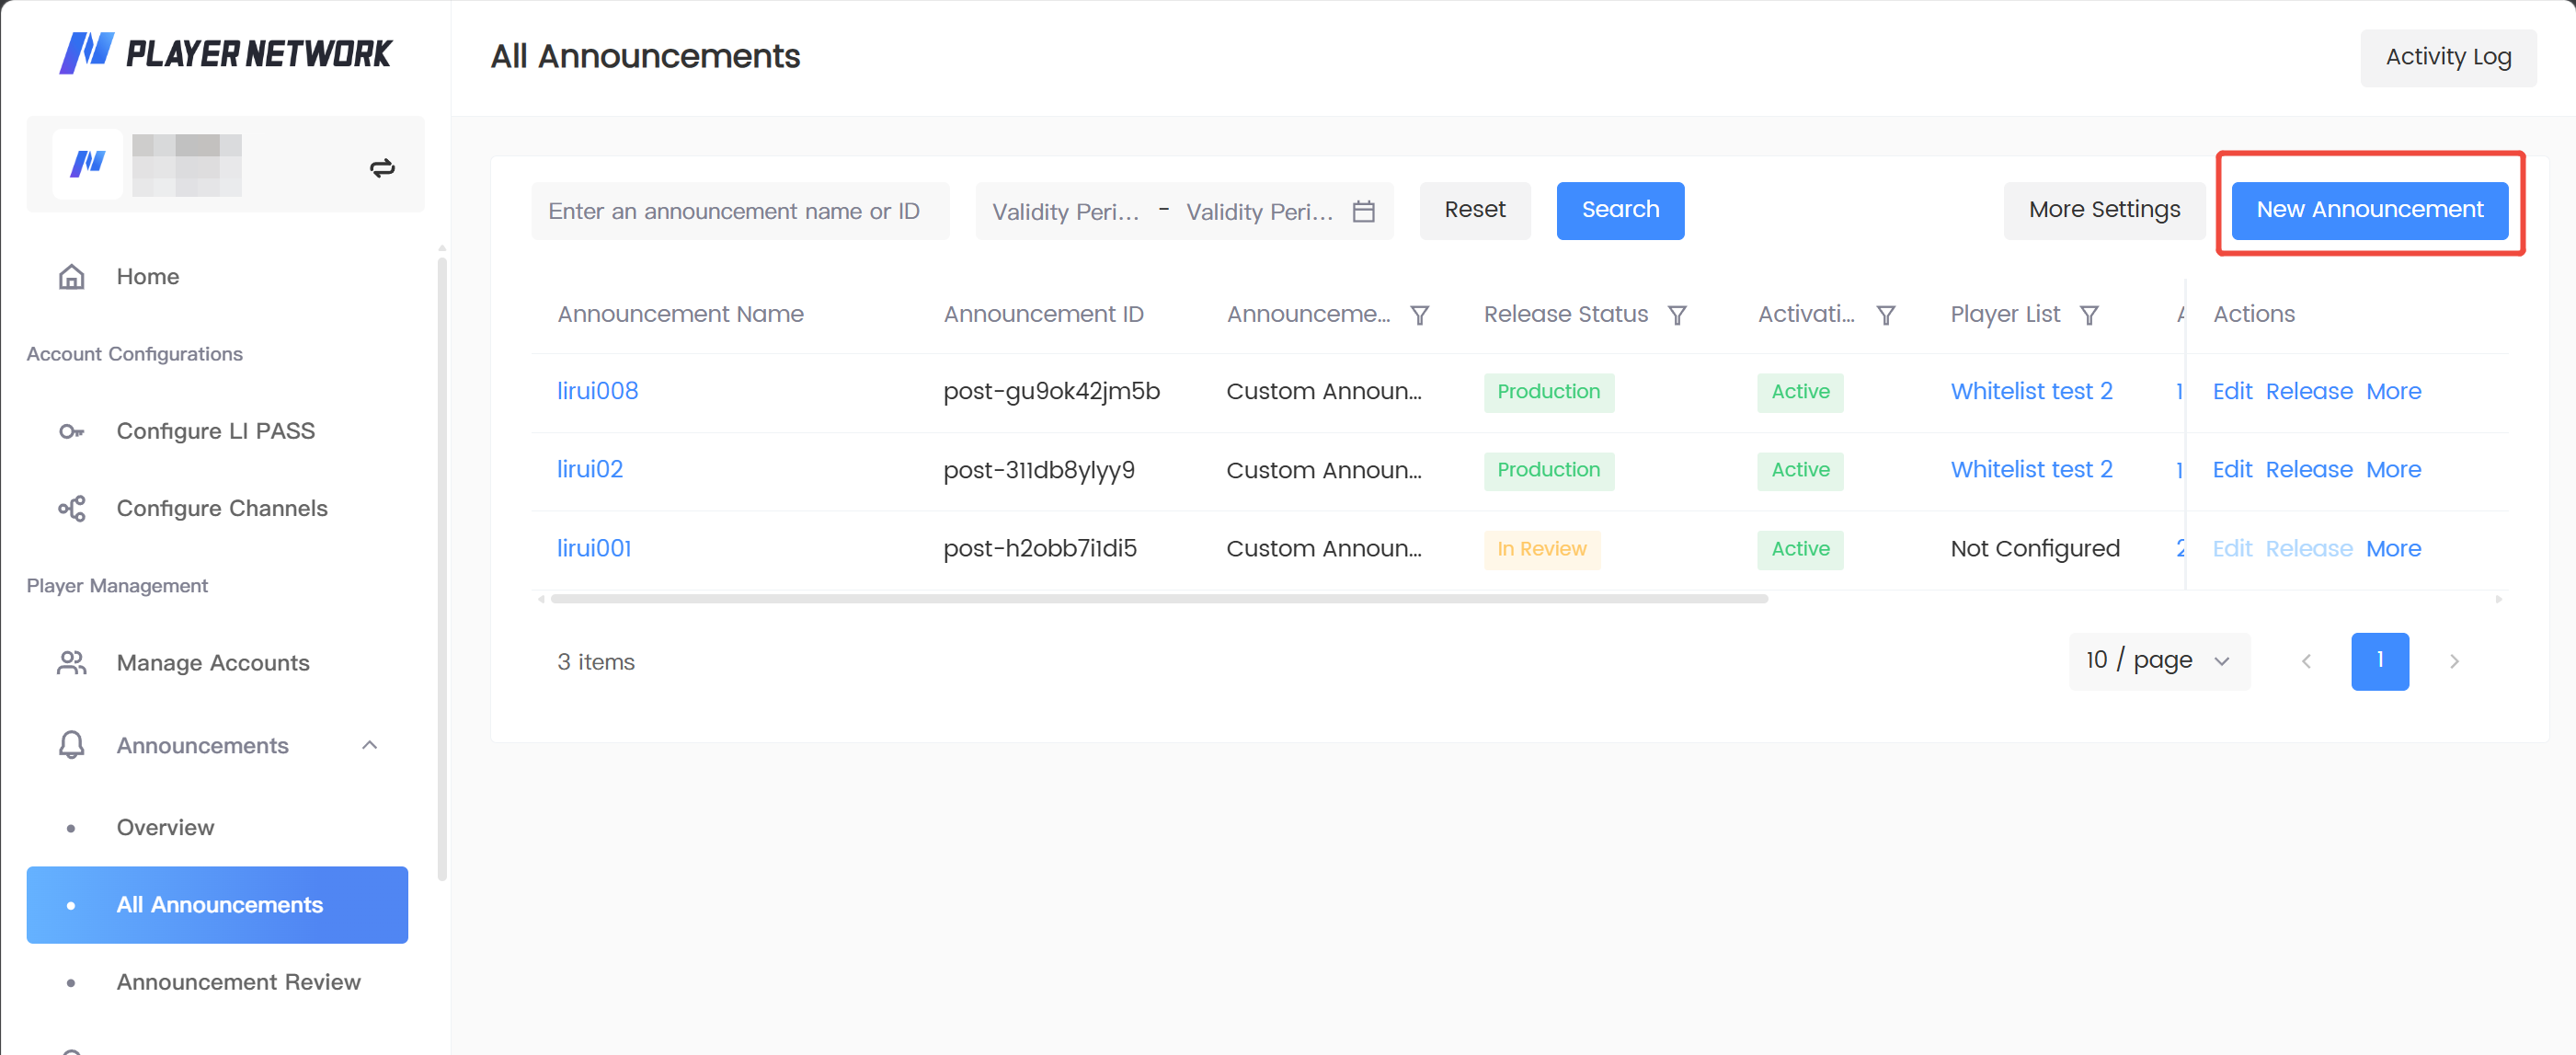
Entry 2: Go to Announcement List and click Create Announcement in the top right corner.
After entering, the page is divided into Basic Information and Announcement Content.
Fill in basic information
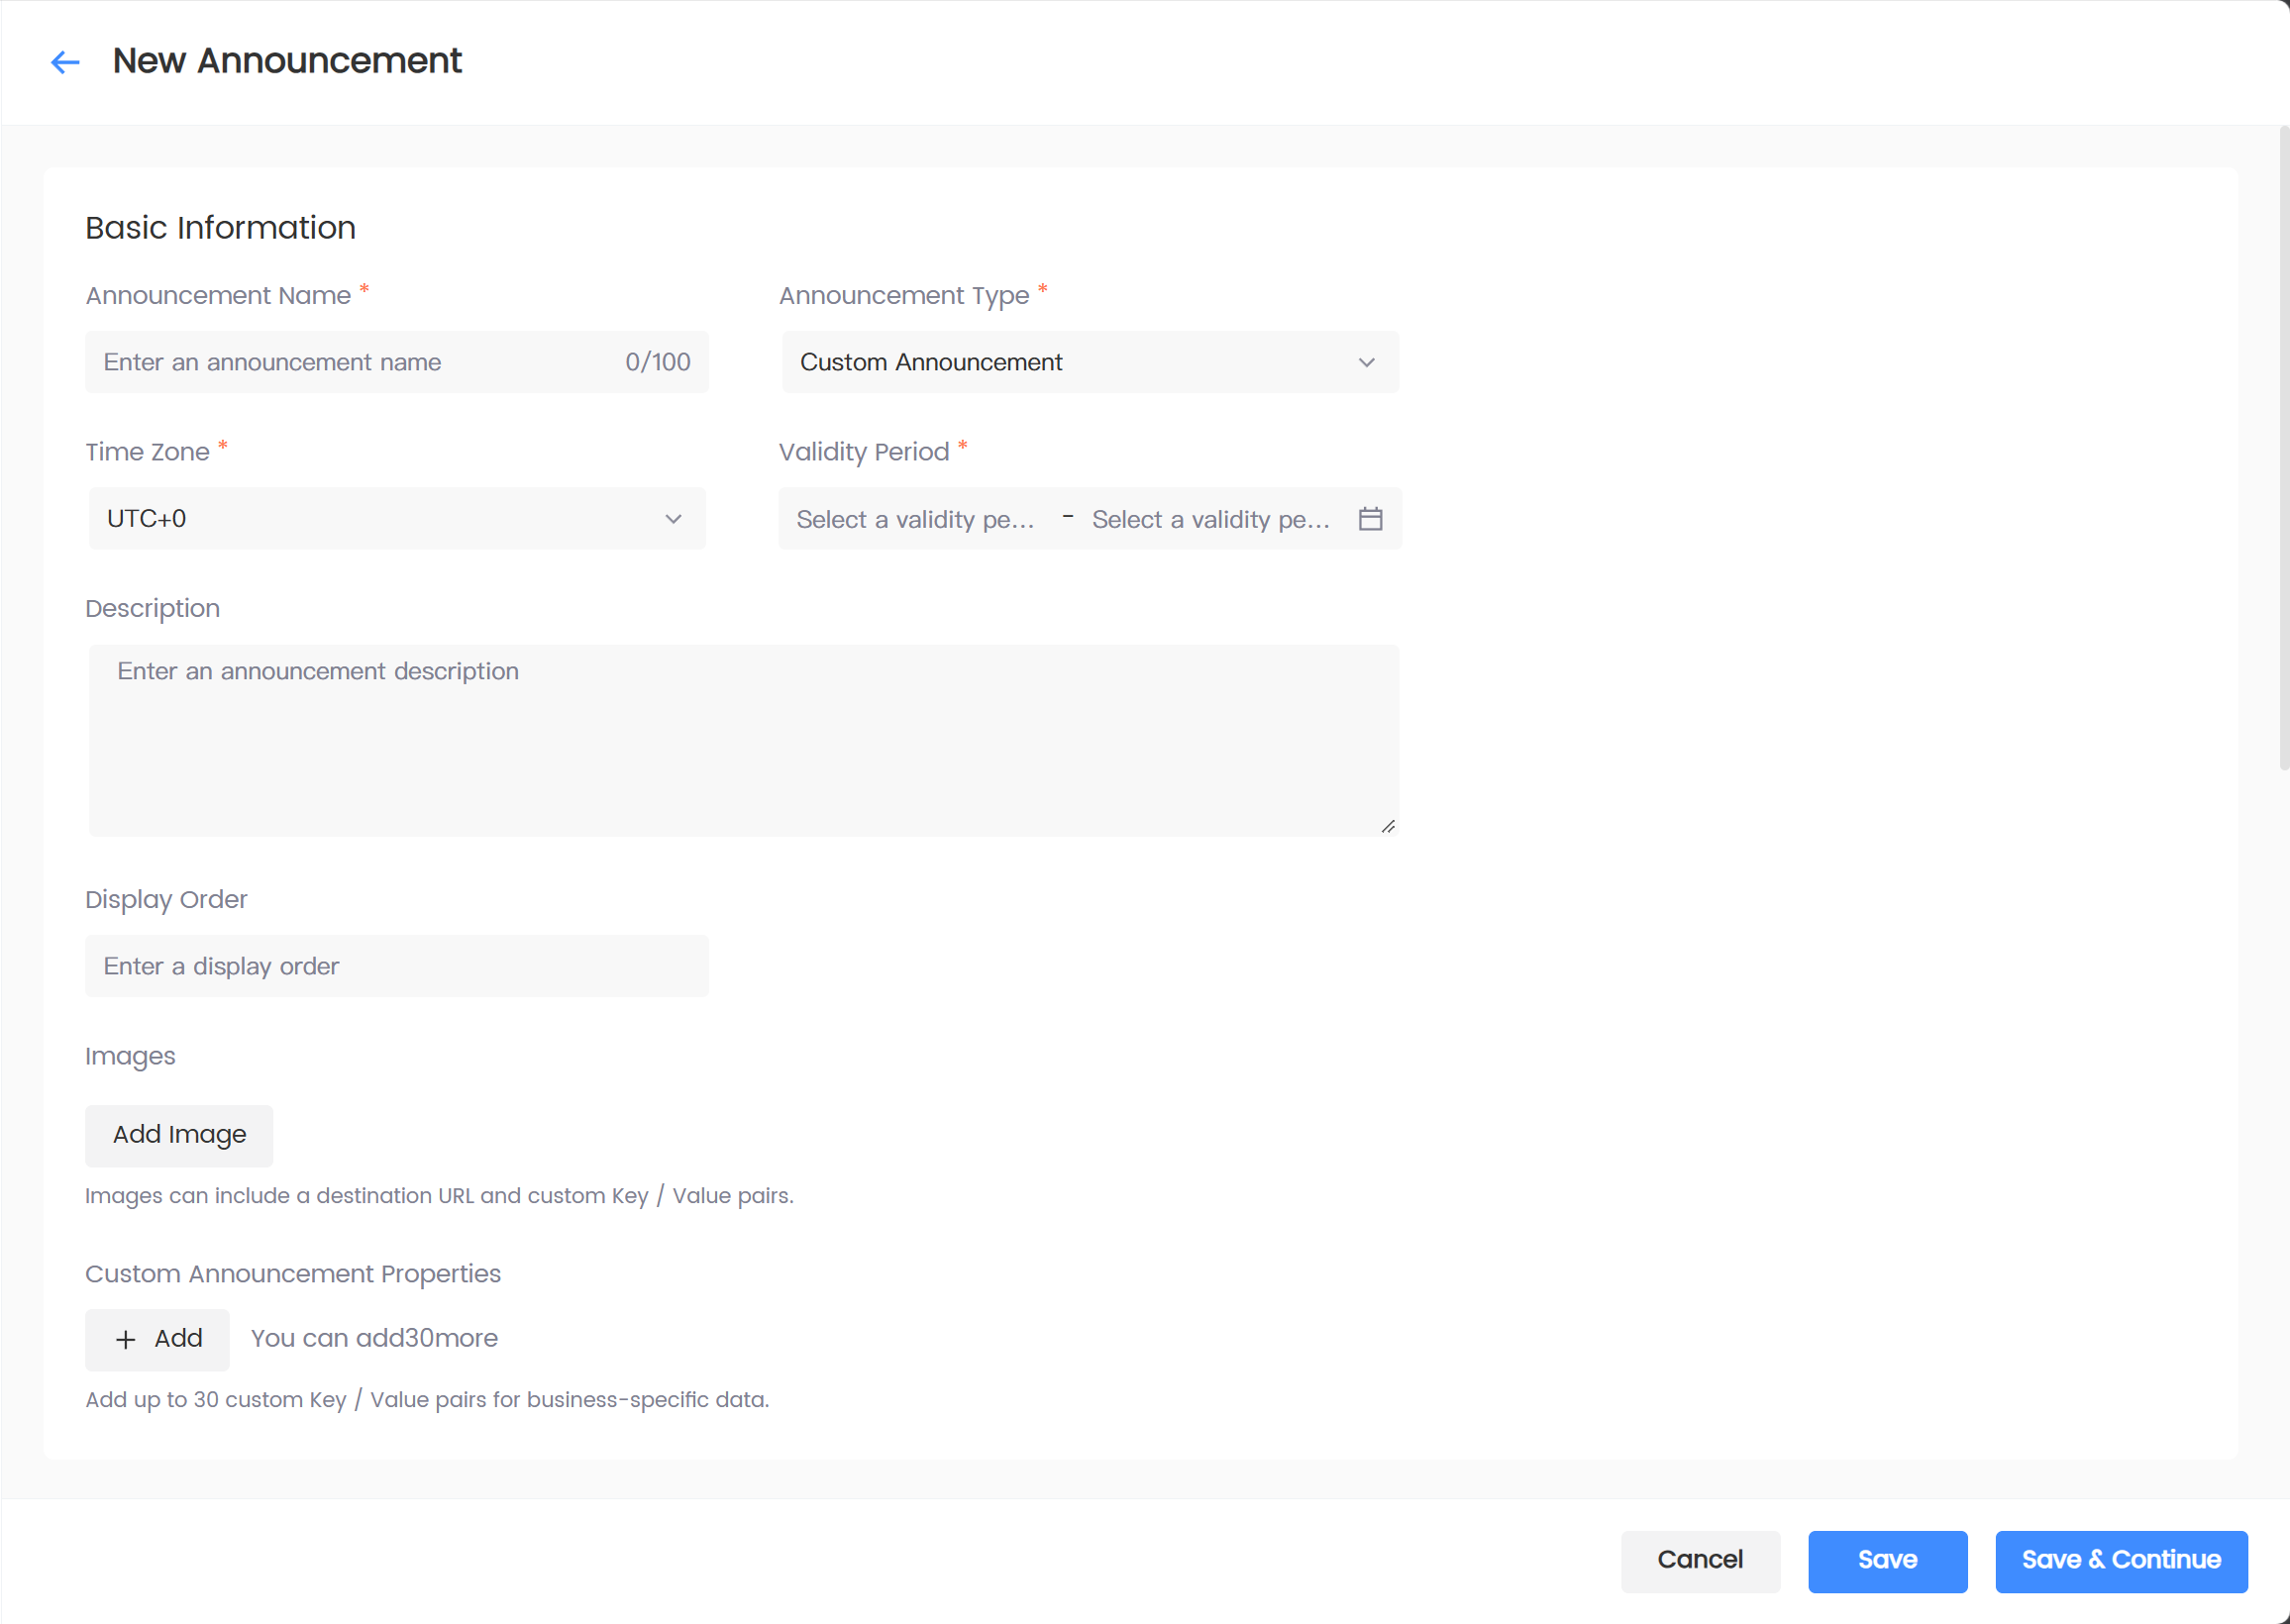
| Field | Required | Filling suggestion |
|---|---|---|
| Announcement name | Yes | For admin identification only; recommended to include date, event, or scenario. Up to 100 characters |
| Announcement type | Yes | Cannot be changed after saving; confirm before the first save |
| Time zone | Yes | Used to indicate which time zone the announcement validity period is calculated in, e.g., UTC+8 Beijing time, UTC+0, UTC+9 Tokyo time |
| Validity period | Yes | Set the start and stop time for the announcement display |
| Description | No | For internal notes; up to 1000 characters |
Fill in the additional fields displayed based on the announcement type:
-
** Pre-login announcement**: Select whether it is a pre-server announcement and fill in the order.
-
** Post-login announcement**: Fill in the order.
-
** Announcement board announcement**: Select the announcement category; if no suitable category exists, click Category Management.
-
** Custom announcement**: Fill in the order, add images and announcement custom attributes as needed, up to 30 Key / Value pairs.
Configure announcement languages
-
Click Language Settings.
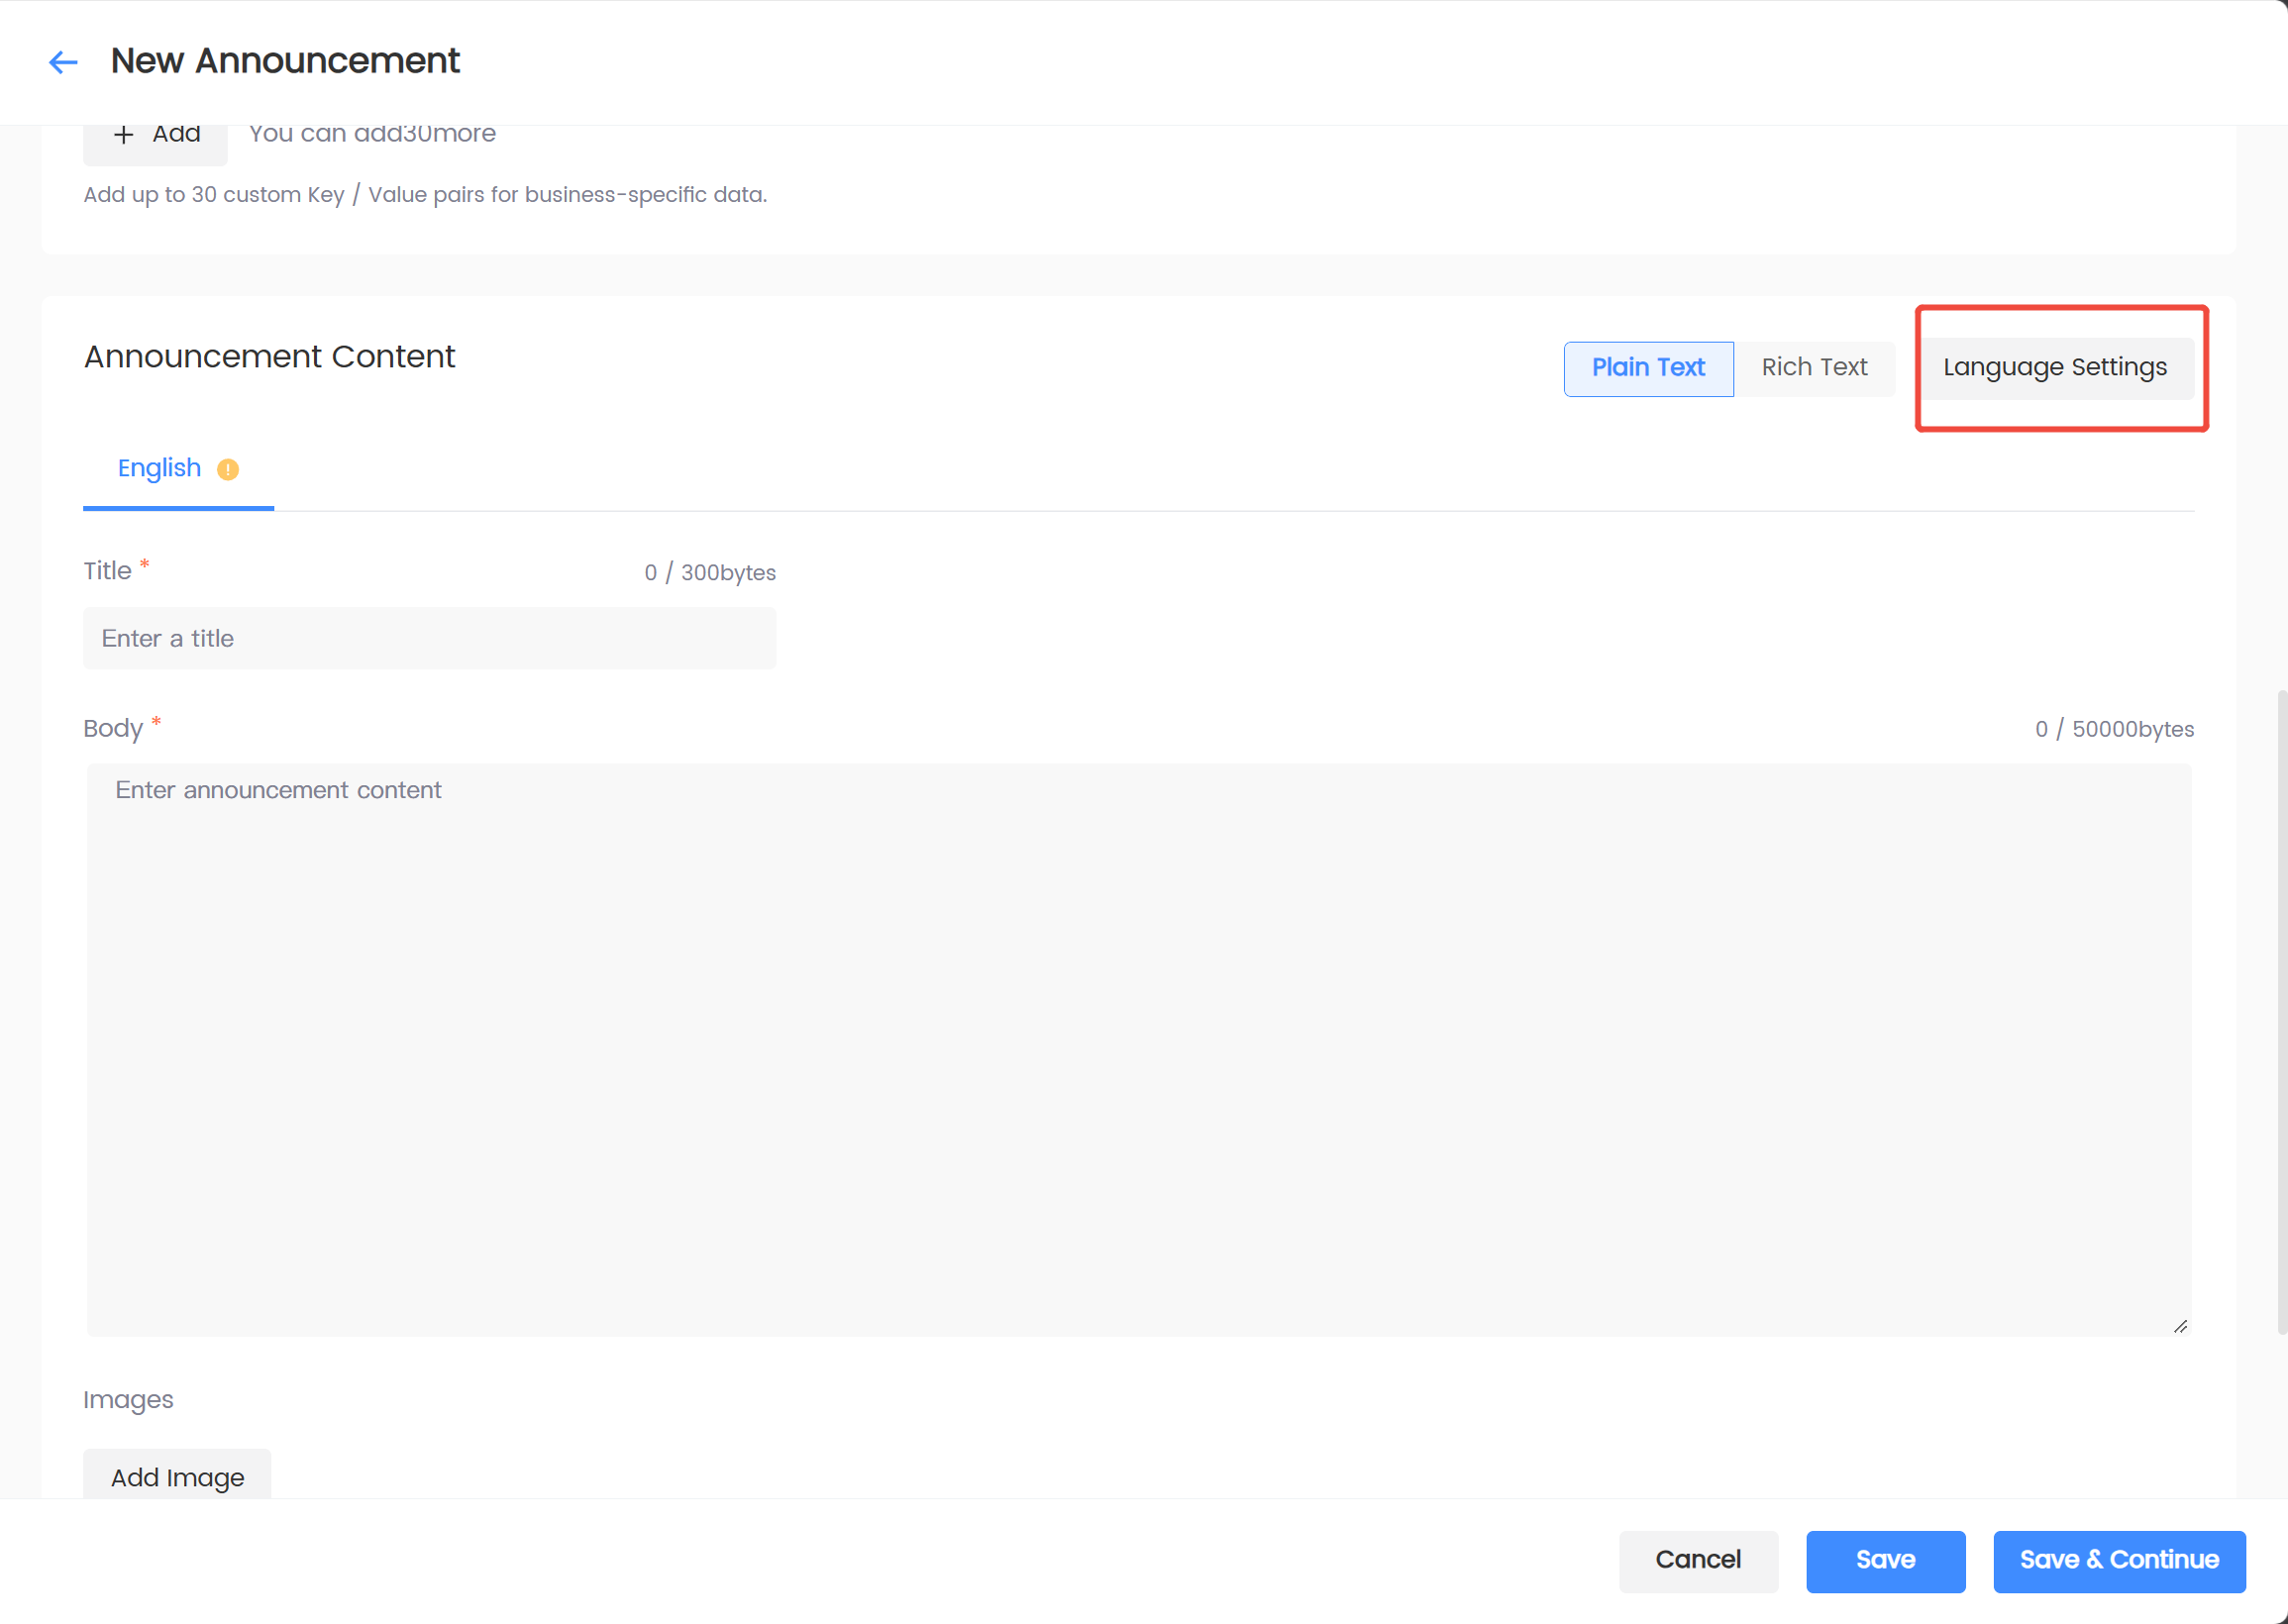
-
Check the languages this announcement needs to support.
-
Keep at least one language.
-
After confirmation, the page will generate corresponding language tabs.
-
Switch between languages and fill in the content.
Language tab status meanings:
-
✓: The required content for this language has been filled in.
-
!: This language still has content to be configured or confirmed.
-
** Default**: The default language of the current announcement.
When switching languages, the current input is saved under the corresponding language. Titles, body text, images, and parameters are independent across different languages.
Fill in title and body
| Content | Required | Operation suggestion |
|---|---|---|
| Title | Yes | The announcement title displayed to users in this language. Up to 300 bytes |
| Body | Yes | The announcement body displayed to users in this language; can contain line breaks and system-supported button tags. Up to 50000 bytes Body supports ** Plain text** and ** Rich text** formats |
Add images and redirect links
-
Under the current language content, click Add Image.
-
Upload JPG or PNG images, each image less than 2 MB.
-
If clicking the image requires a redirect, fill in the complete redirect link.
-
If the client needs to read image parameters, add Key / Value.
-
Configure separate links and parameters for each image.
Save announcement
There are three operations at the bottom of the page:
| Operation | Result |
|---|---|
| Cancel | Return to Announcement List without saving current changes |
| Save | Save as ** Pending Publish** and return to Announcement List |
| Save & Next | Save as ** Pending Publish** and enter publish scope settings |
If you are unsure about the publish scope for now, select ** Save**; select ** Save & Next** when ready to continue publishing.
Configure publish scope
After the announcement is saved, you can enter directly from ** Save & Next**, or click ** Publish** on the announcement in ** Announcement List**.
Select publish environment
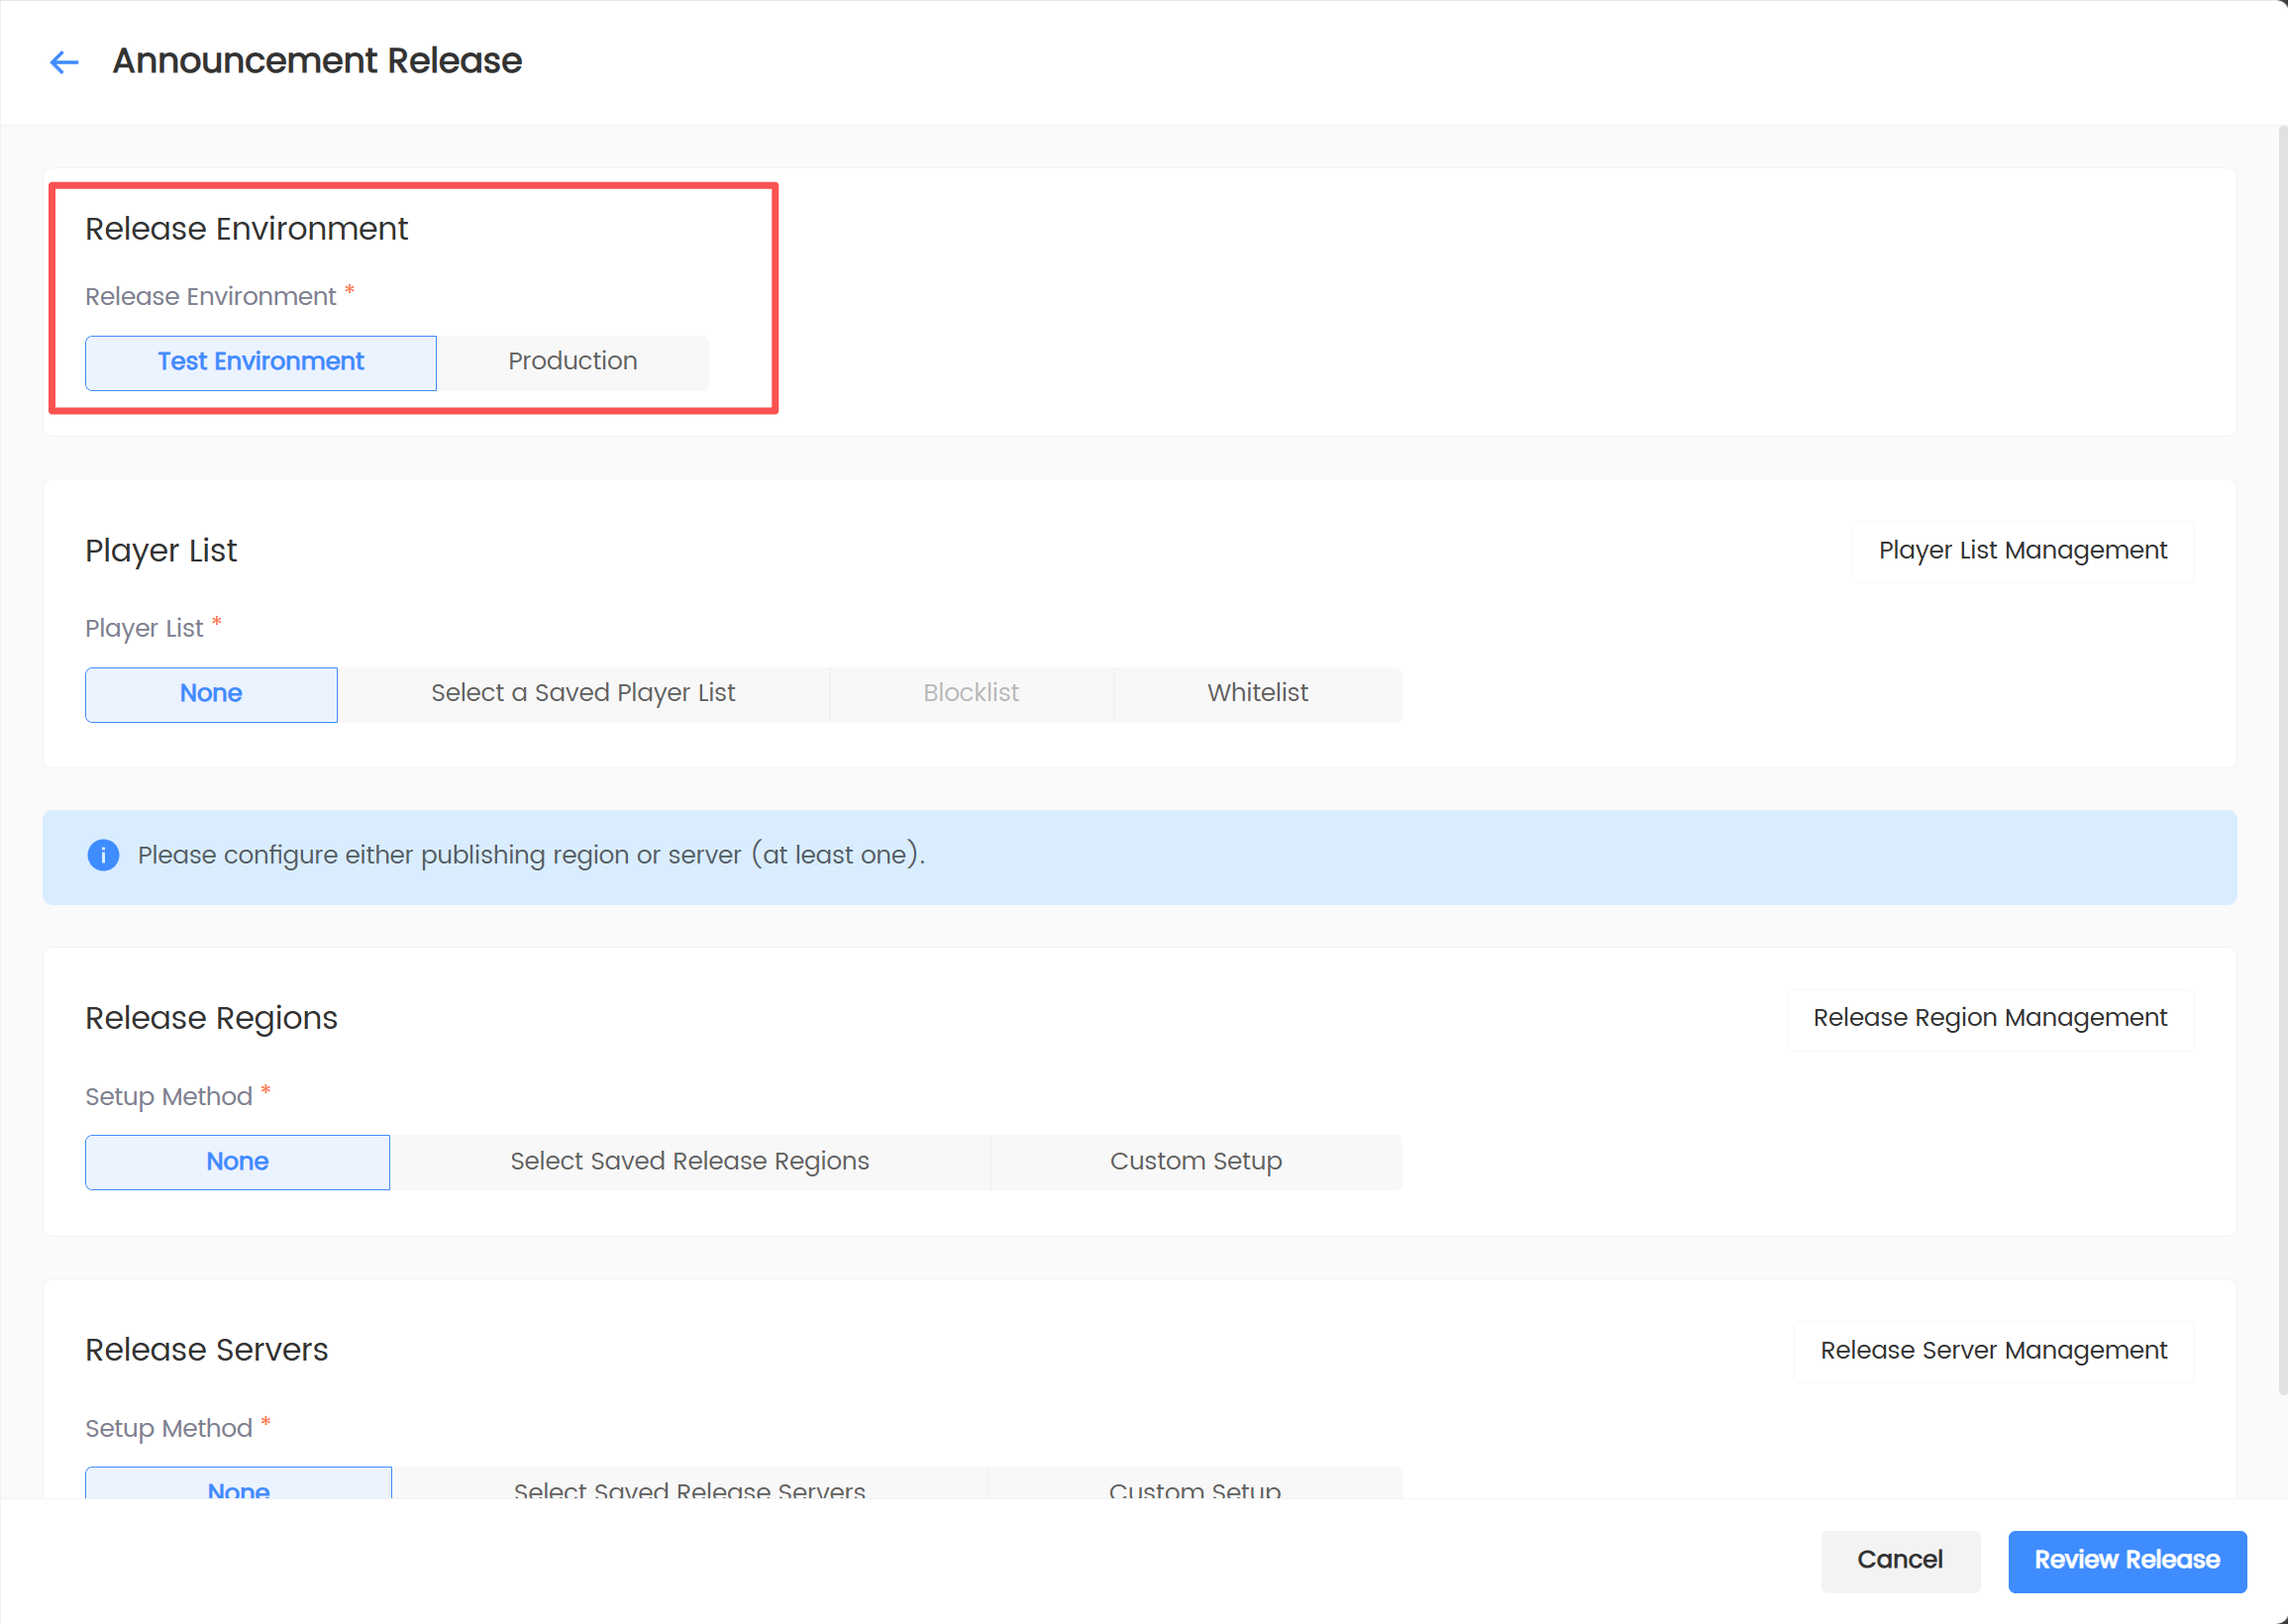
| Environment | Applicable scenario |
|---|---|
| Test environment publish | Verify announcement content, images, and display effect; recommended for first publish |
| Production environment publish | Publish to production players; may require entering the review process |
Announcements already published to the production environment cannot be republished to the test environment. To retest, take the announcement offline first according to the actual process.
Configure player list
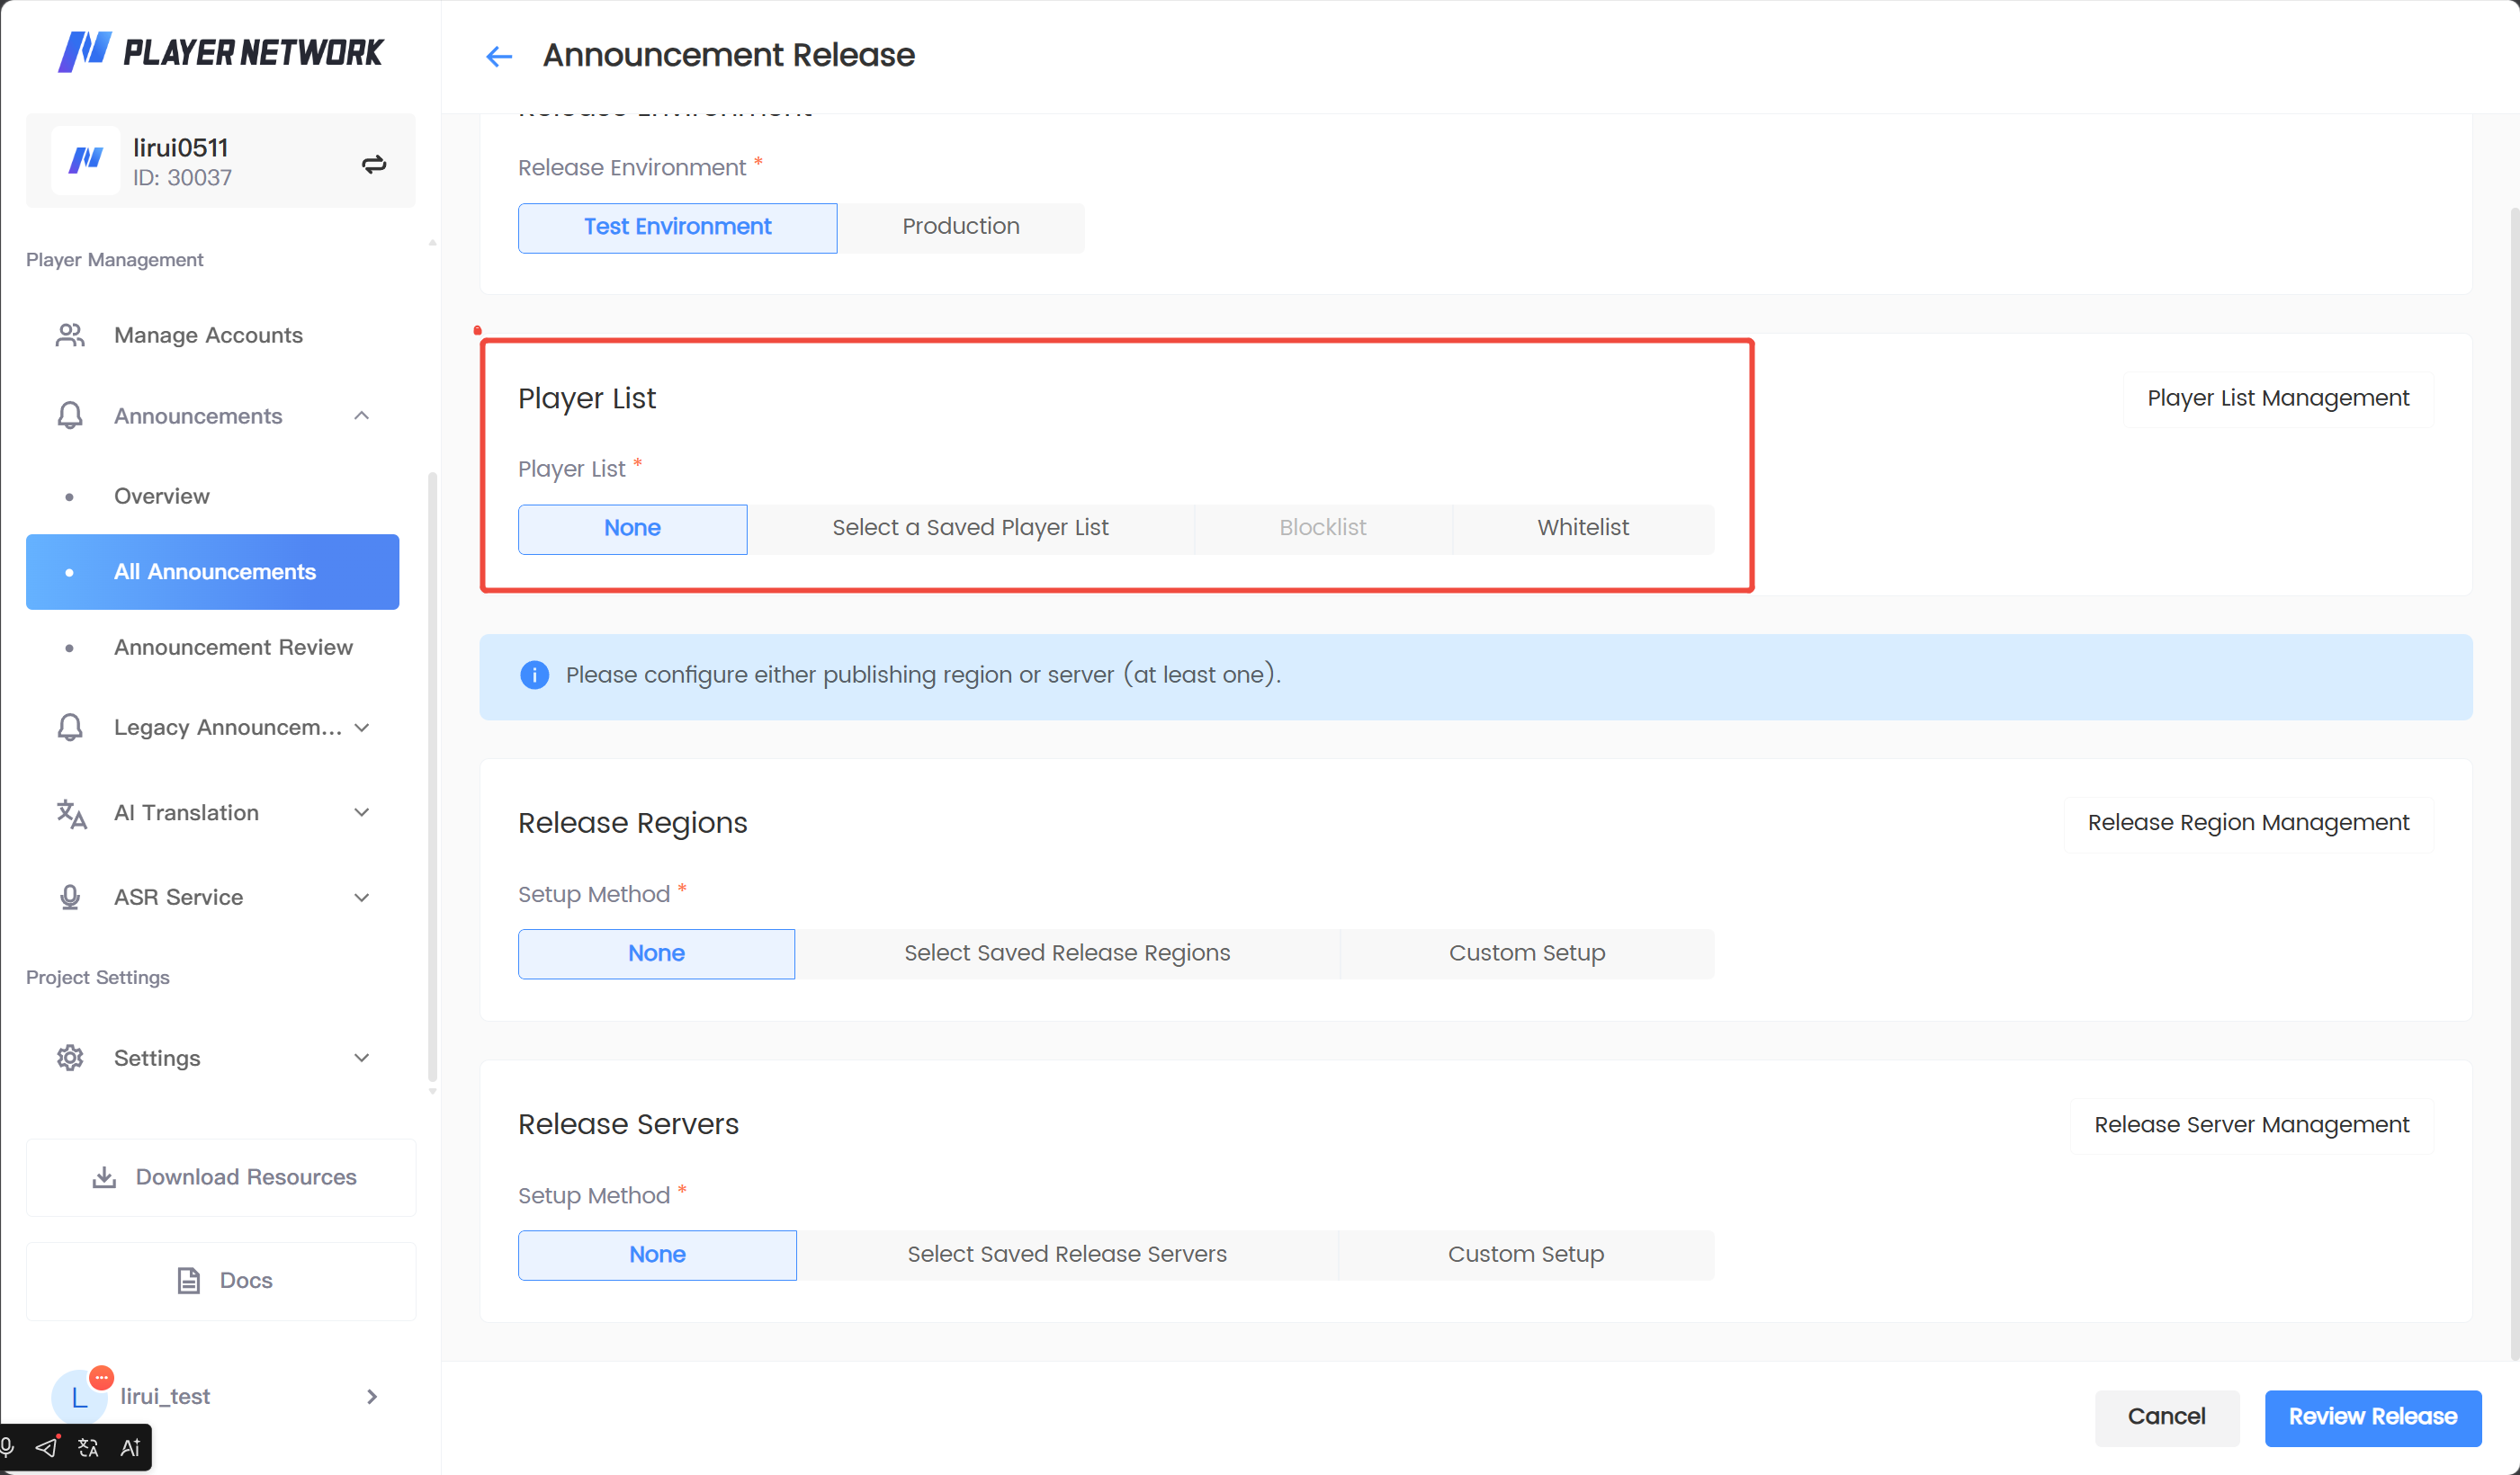
There are four player list options:
| Option | Applicable scenario | Subsequent configuration |
|---|---|---|
| None | Do not restrict players by list | No secondary configuration |
| Select saved player list | Reuse a previously maintained list | Select from dropdown |
| Blocklist | Exclude specified players | Select OpenID or DeviceID, and fill in IDs line by line |
| Allowlist | Only allow specified players | Select OpenID or DeviceID, and fill in IDs line by line |
For lists that need long-term reuse, save them in ** Player List Management** first; temporary lists can be filled in directly on the publish page.
Configure publish region
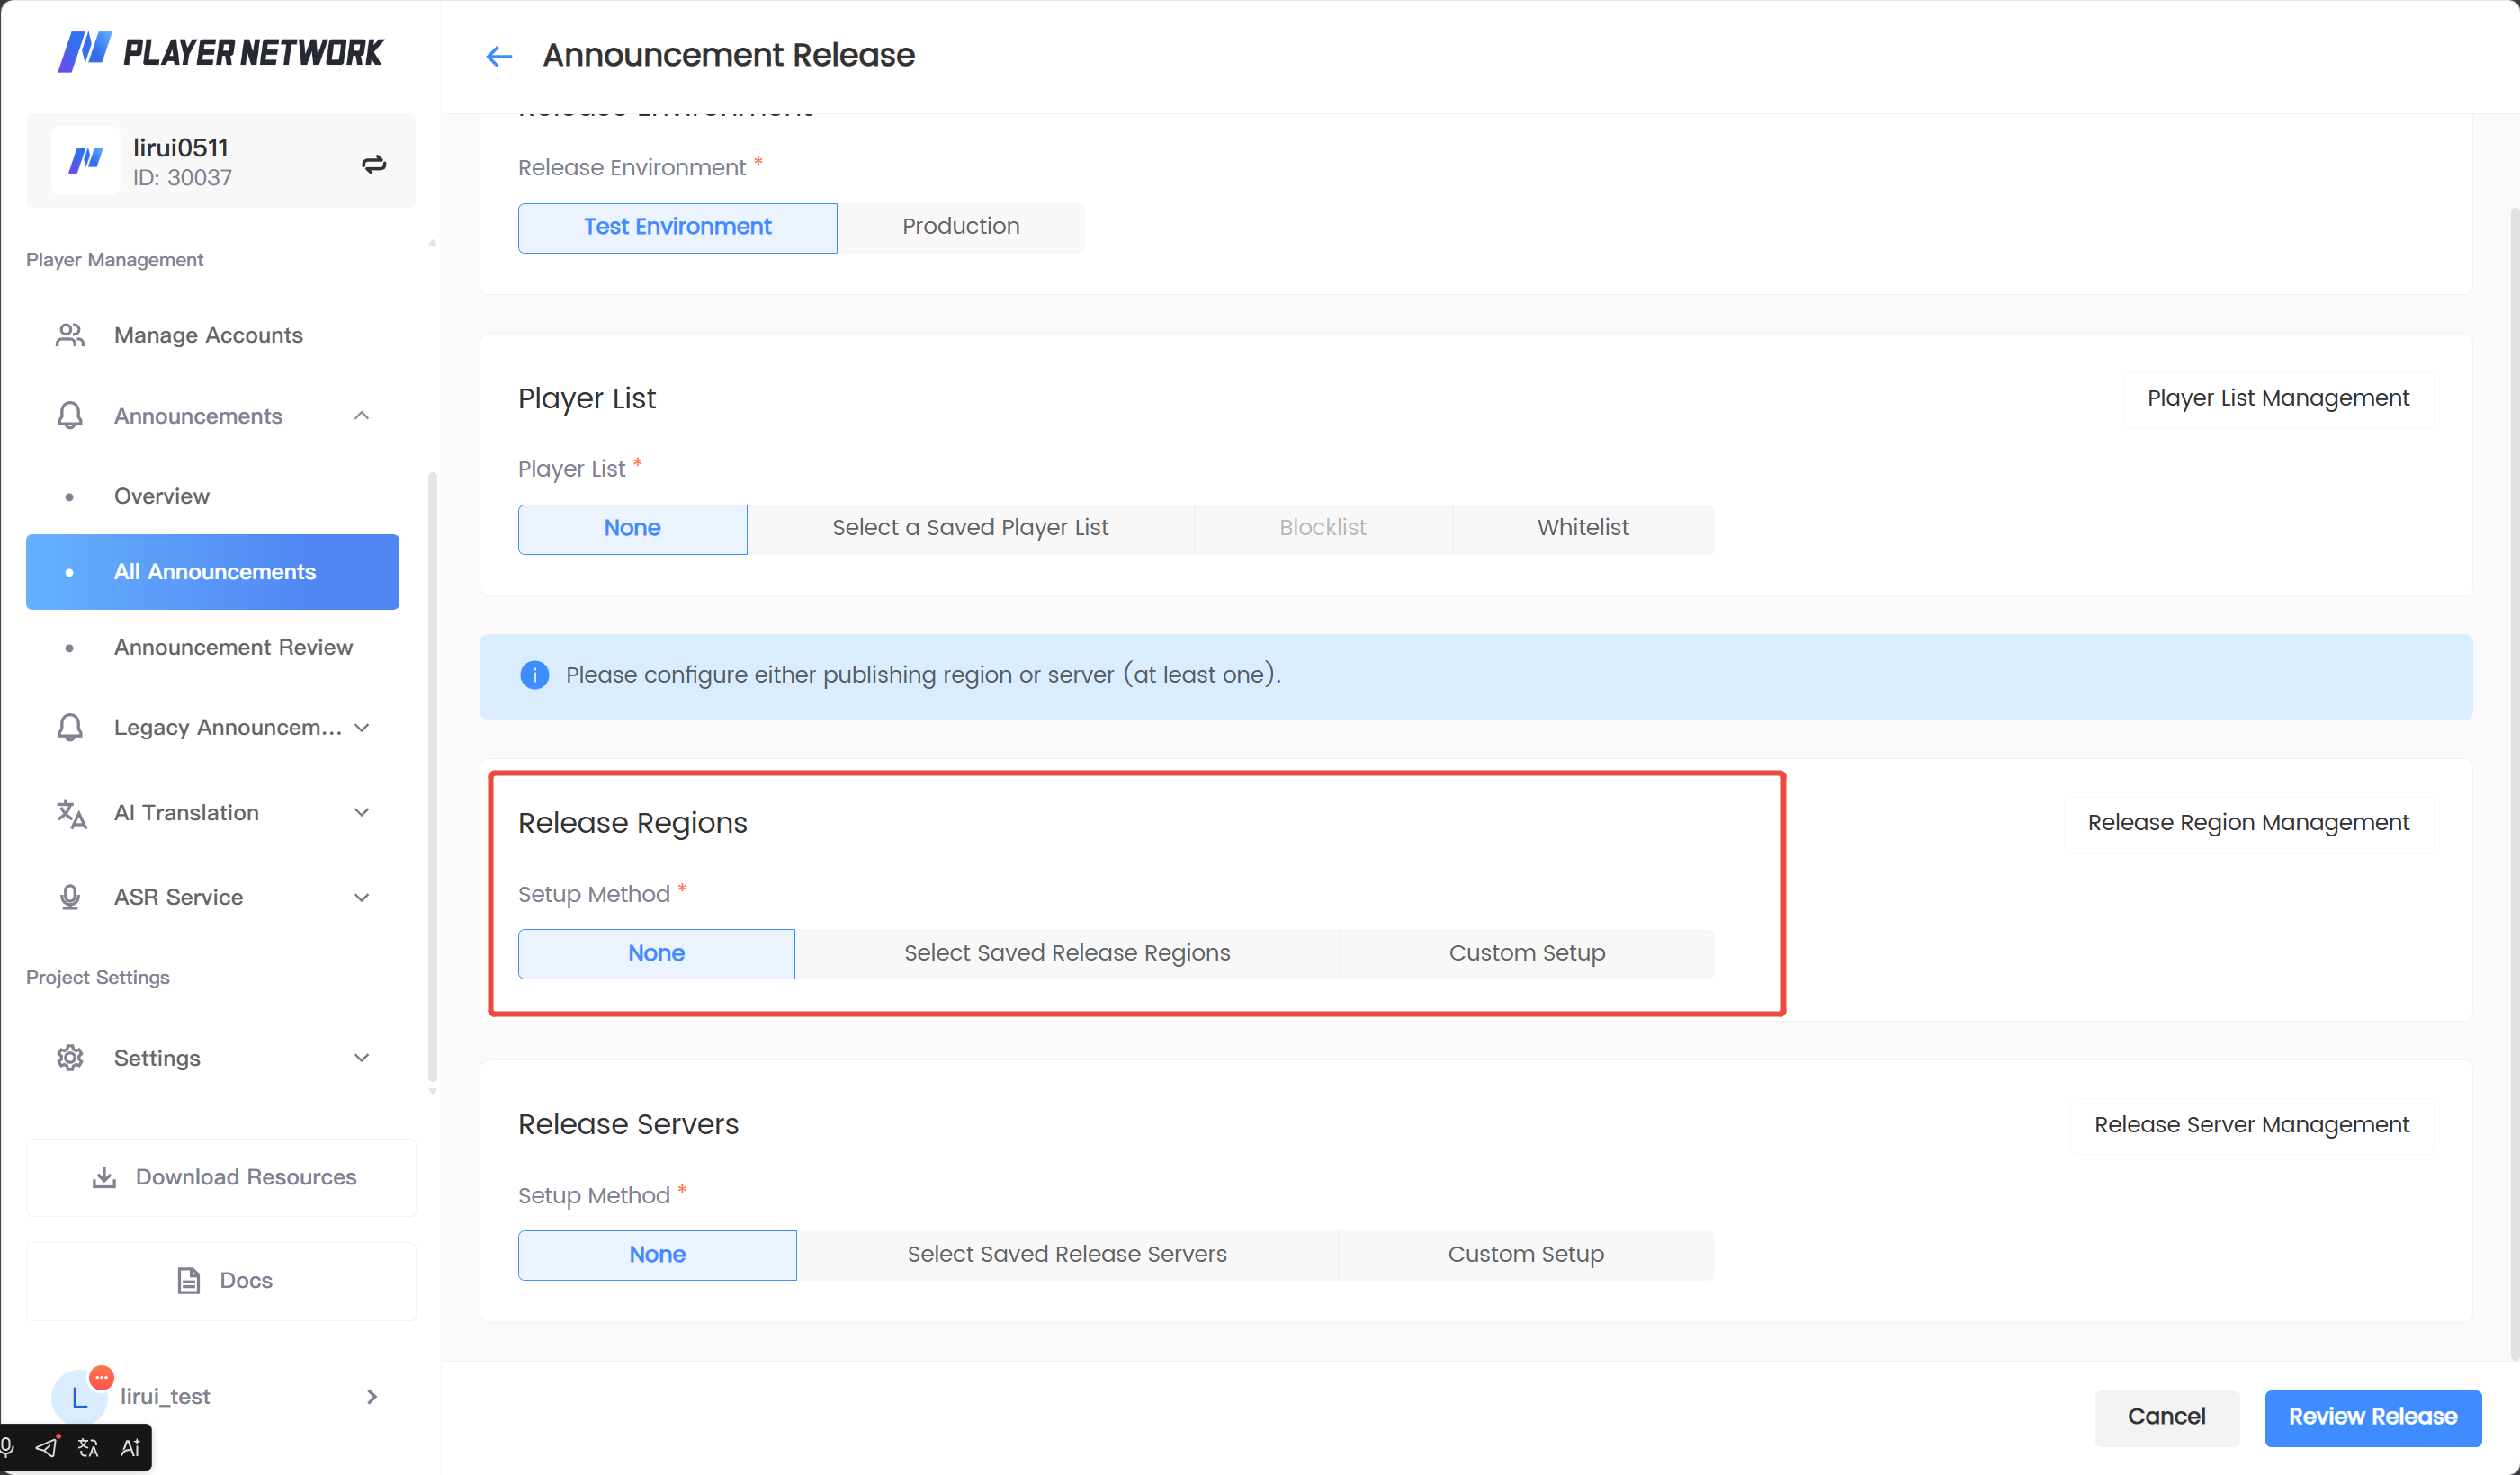
Publish region options:
-
** None**: Do not restrict by region this time.
-
** Select saved publish region**: Reuse admin configuration, e.g., global or key regions.
-
** Custom configuration**: Temporarily multi-select countries and regions.
Configure publish server
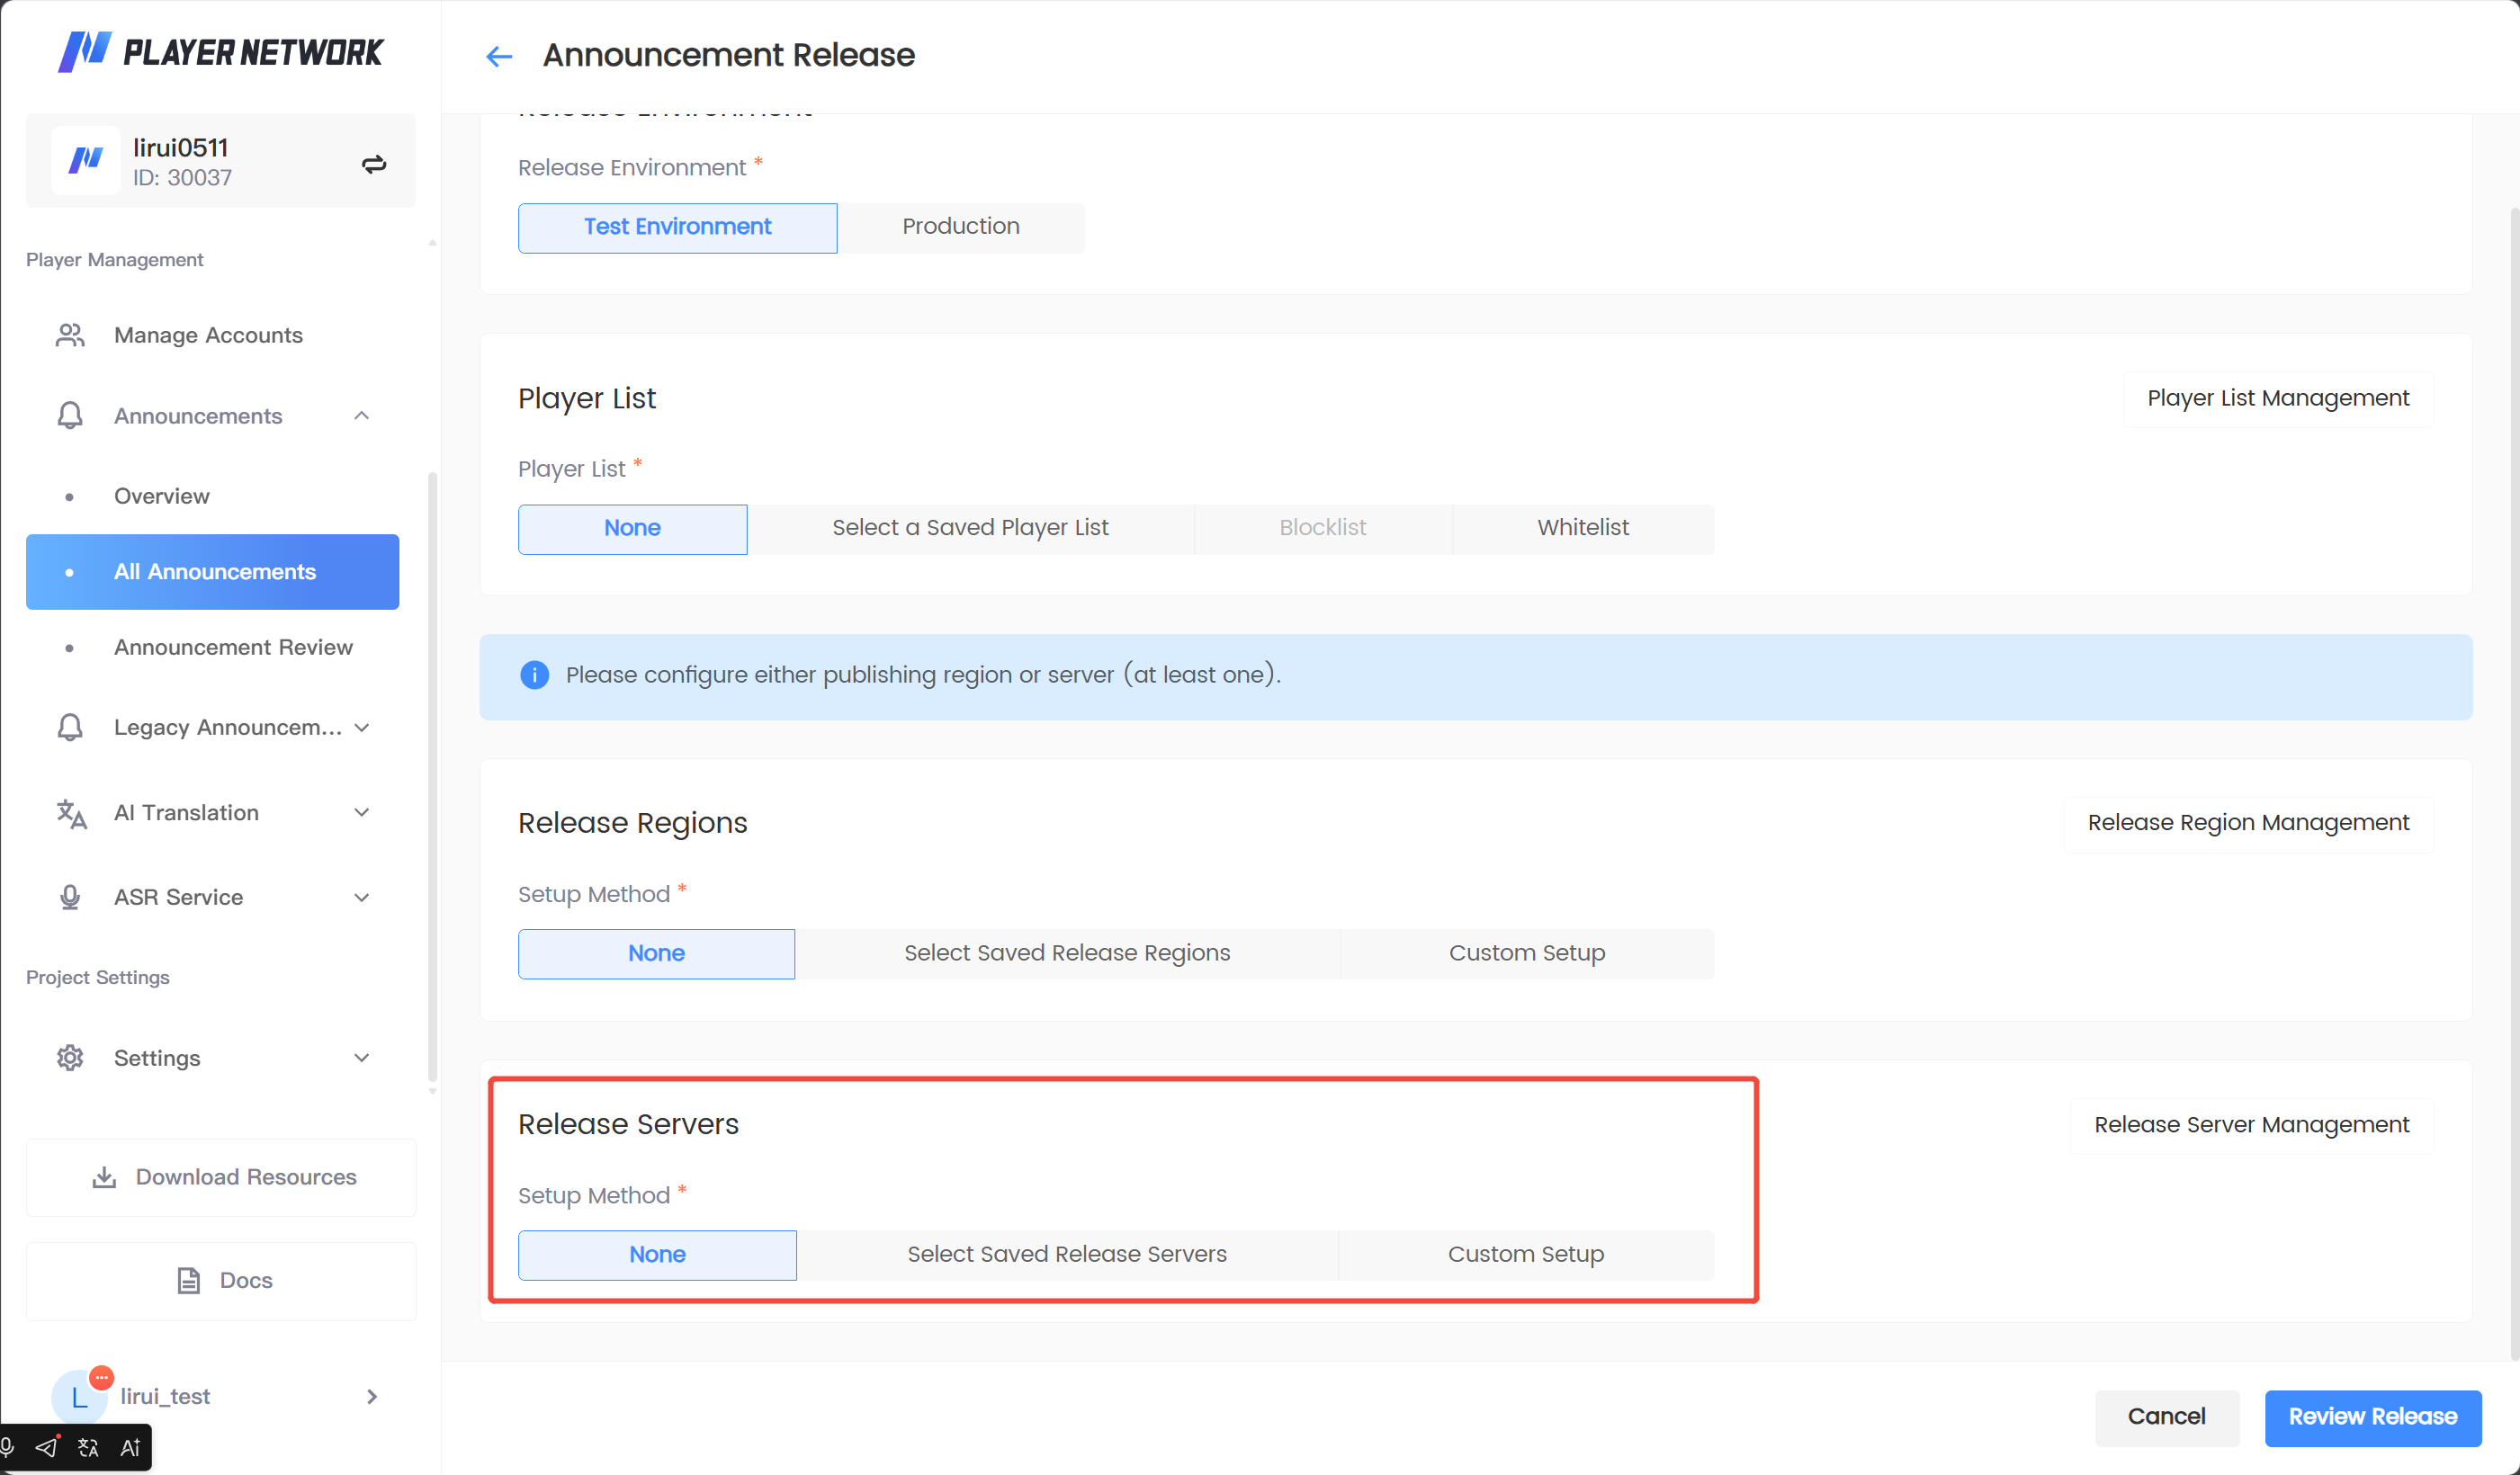
Options:
-
** None**: Do not restrict by server this time.
-
** Select saved publish server**: Select a configured server group.
-
** Custom configuration**: Fill in one server ID per line.
At least one of publish region and publish server must be configured. The current Demo only displays a prompt and does not yet enforce blocking of empty scopes, so manual verification is required before submission.
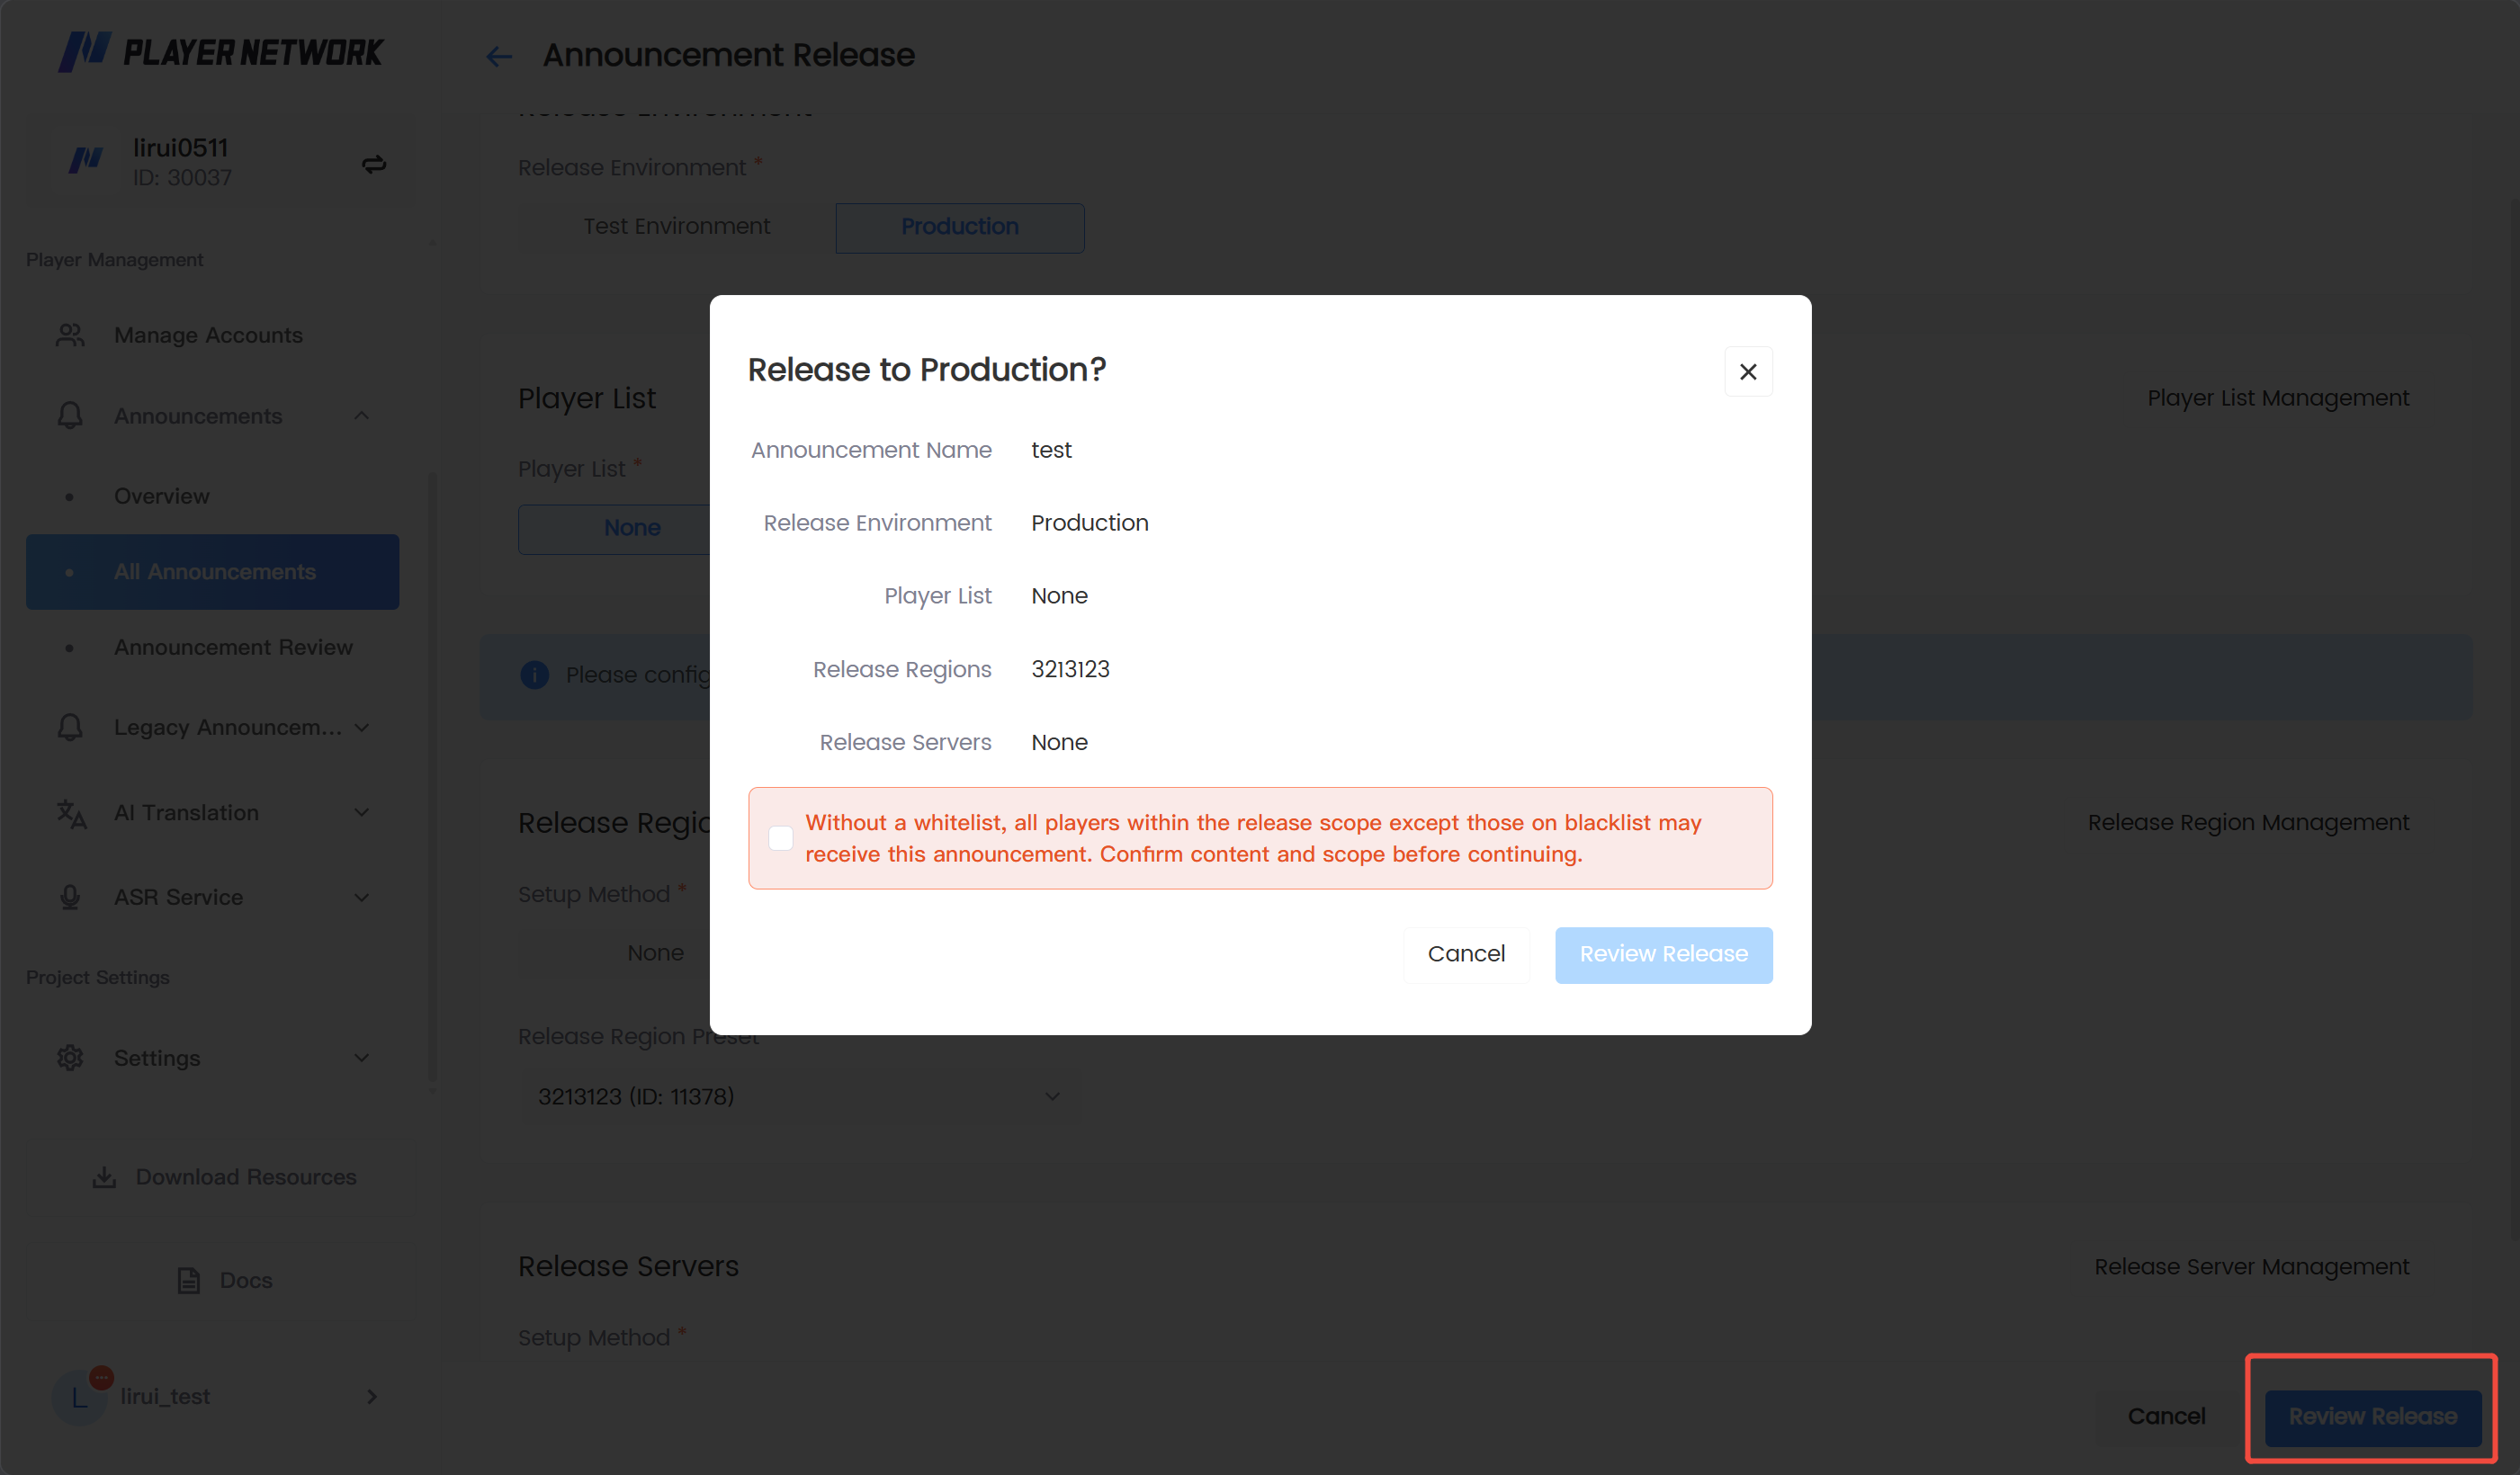
Confirm publish
-
Click ** Confirm Publish**.
-
Review the announcement name, publish environment, player list, publish region, and publish server.
-
Confirm and submit.
When both of the following conditions are met, the confirmation popup will display an additional risk reminder:
-
Select ** Production Environment Publish**;
-
Player list is set to ** None**.
In this case, check the ** No allowlist configured** confirmation item, indicating that you are aware that all players in the publish scope except blocklisted players may receive the announcement. Submission is not allowed until checked.
Test environment publish, or production environment with a player list already selected, does not show this additional confirmation item.
Query and manage announcements
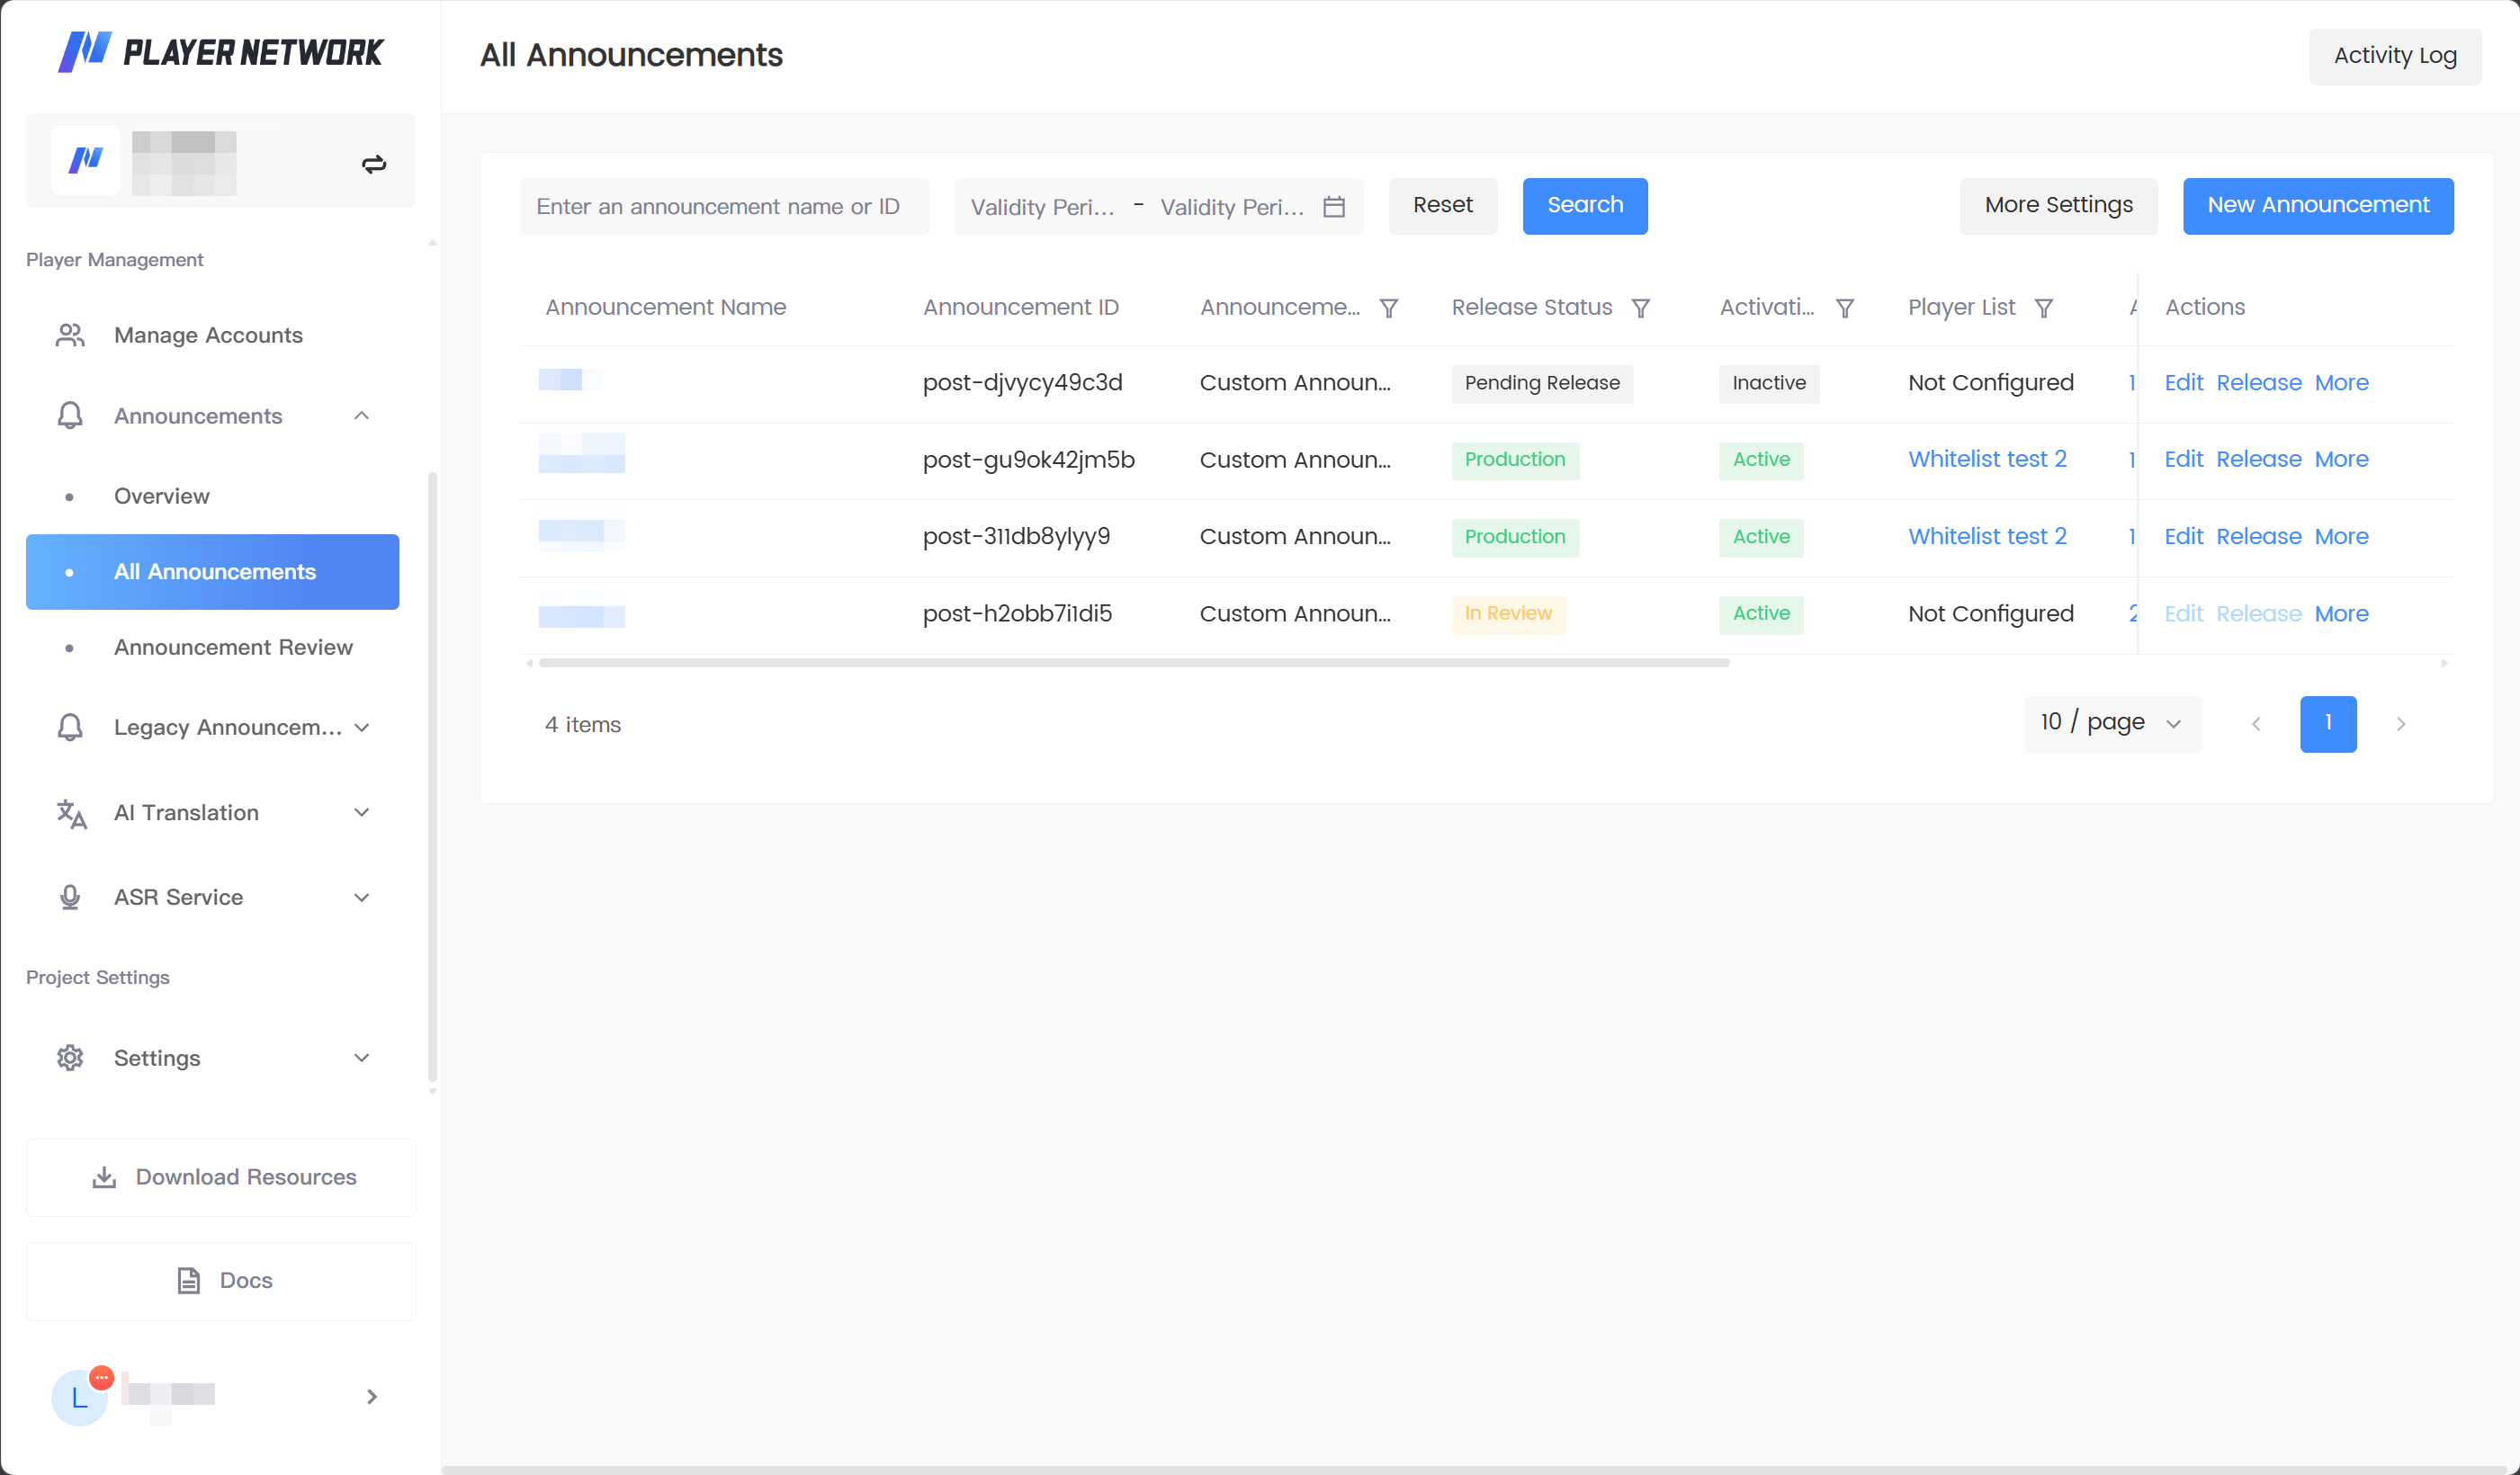
Search, filter, and sort
In ** Announcement List**, you can:
-
Query by announcement name or ID.
-
Query by validity period.
-
Filter announcement type, publish status, effective status, and player list in column headers.
-
Toggle ascending or descending order by creation time.
-
Click ** Reset** to clear filters and restore all announcements.
You can also click the pending publish, test environment, production environment, or effective data cards from ** Overview**, and the system will enter ** Announcement List** and automatically apply the corresponding filter.
Understand announcement status
| Status | Meaning | Next step |
|---|---|---|
| Pending publish | Content saved but not yet published | Edit or configure publish scope |
| Test environment | Published to test environment | Verify then publish to production environment |
| Under review | Production publish or offline is waiting for review | Wait for reviewer to approve or reject |
| Production environment | Published to production environment | Monitor effective status; take offline if needed |
| Offline | Publishing stopped | Decide whether to edit or recreate based on page status |
** Publish status** indicates the position in the publishing workflow; ** effective status** indicates whether the announcement is currently within its validity period. Do not confuse the two.
Common row actions
| Action | Purpose | Notes |
|---|---|---|
| Click announcement name | View announcement details | Edit may not be available in view mode |
| Edit | Modify announcement content | Announcements under review cannot be edited currently |
| Publish | Enter publish scope settings | May be unclickable when under review or validity period has ended; refer to button hints |
| Duplicate | Create a copy based on an existing announcement | The copy needs to be re-checked and saved |
| Take offline | Stop test or production environment announcement | May require review depending on review settings |
| Delete | Delete non-effective announcements | Effective or restricted announcements cannot be deleted |
Unactionable buttons will appear disabled. Hover over a button to view the reason.
Manage common configurations
Enter ** Announcement List → More Settings** to manage:
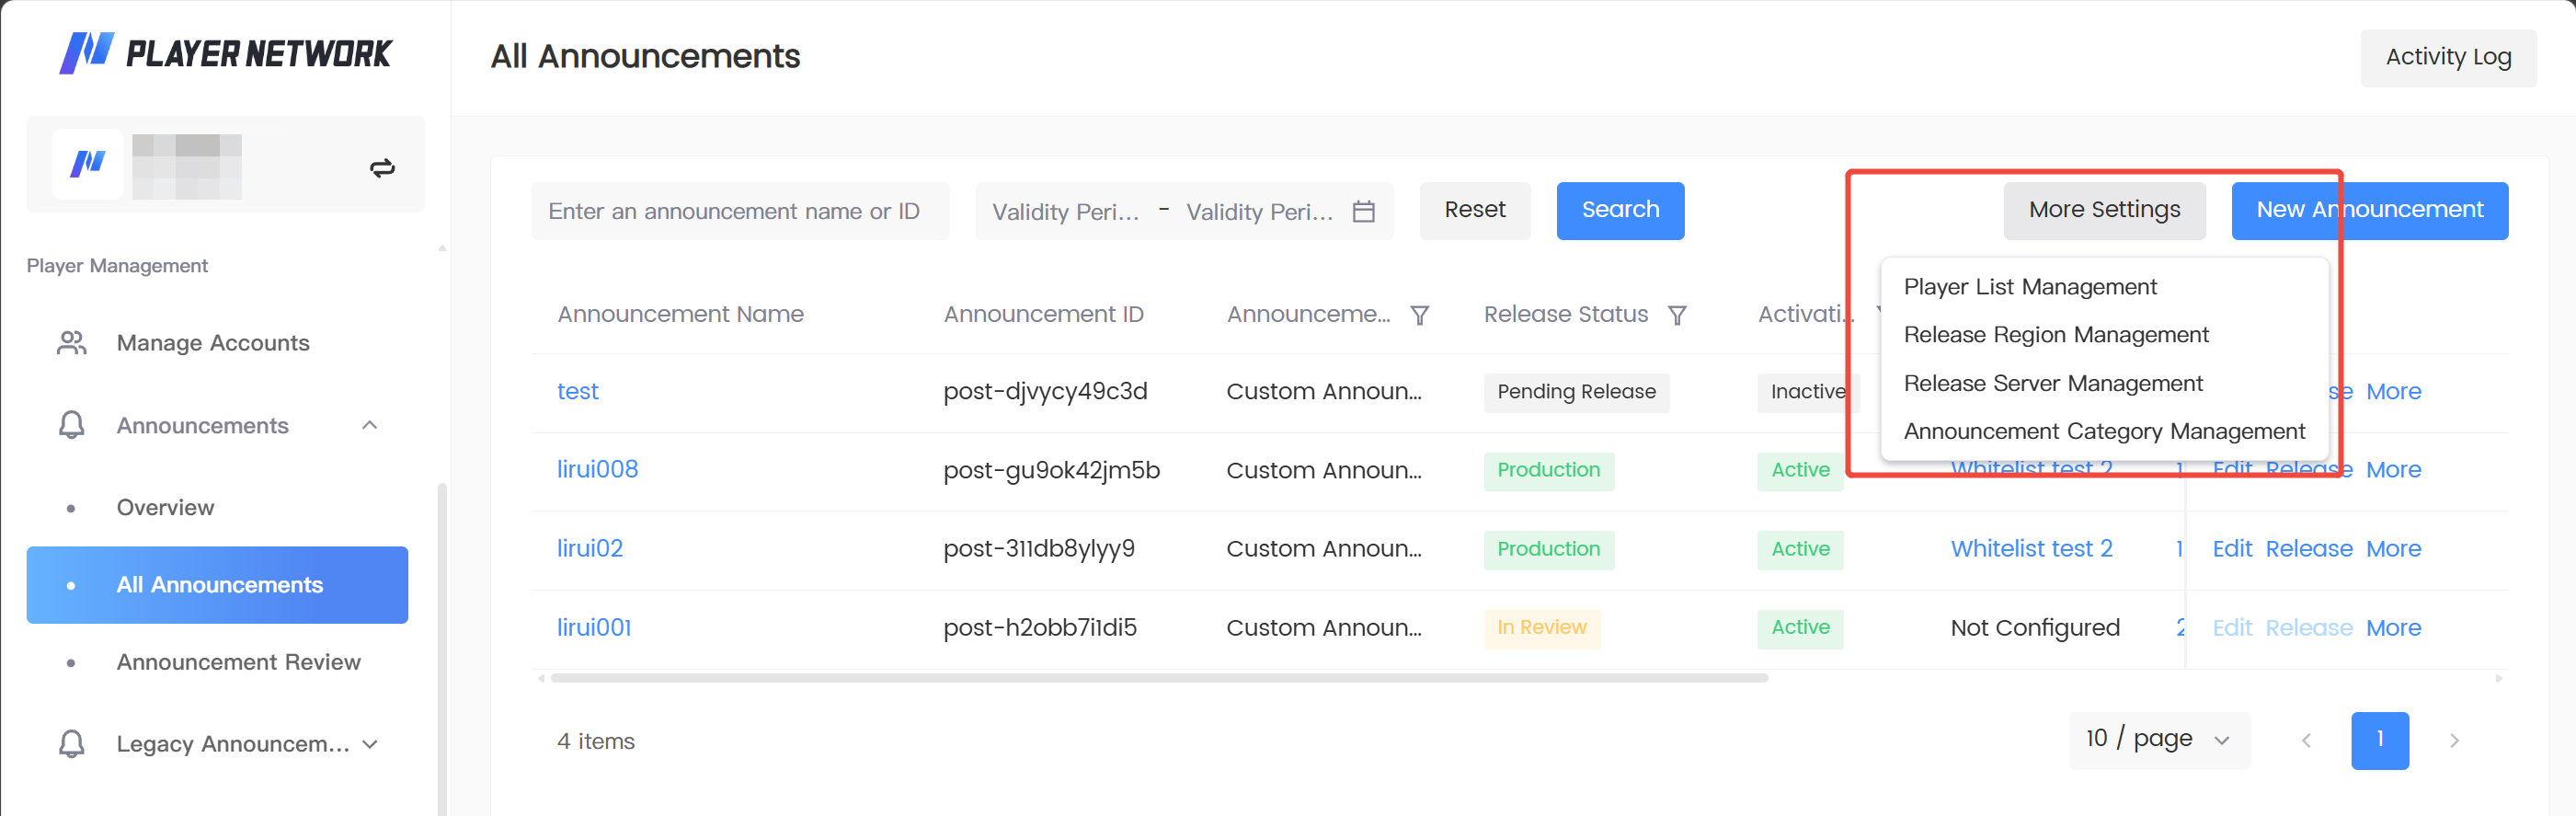
Player list management
-
View the name, ID, blocklist/allowlist nature, ID type, and quantity of saved lists.
-
Add, edit, or delete player lists.
-
OpenID corresponds to player ID; DeviceID corresponds to device ID.
-
Configurations used by announcements may not be deletable; the button will show the disabled reason.
Publish region management
-
Set the region name.
-
Multi-select the countries and regions included in this region.
-
After saving, it can be directly reused in publish configuration.
Publish server management
-
Set the server group name.
-
Fill in one server ID per line.
-
After saving, it can be directly reused in publish configuration.
Announcement category management
-
Set the category name and description.
-
After saving, it is available for selection by announcement board announcements.
Announcement review
Only users configured as reviewers need to handle this chapter.
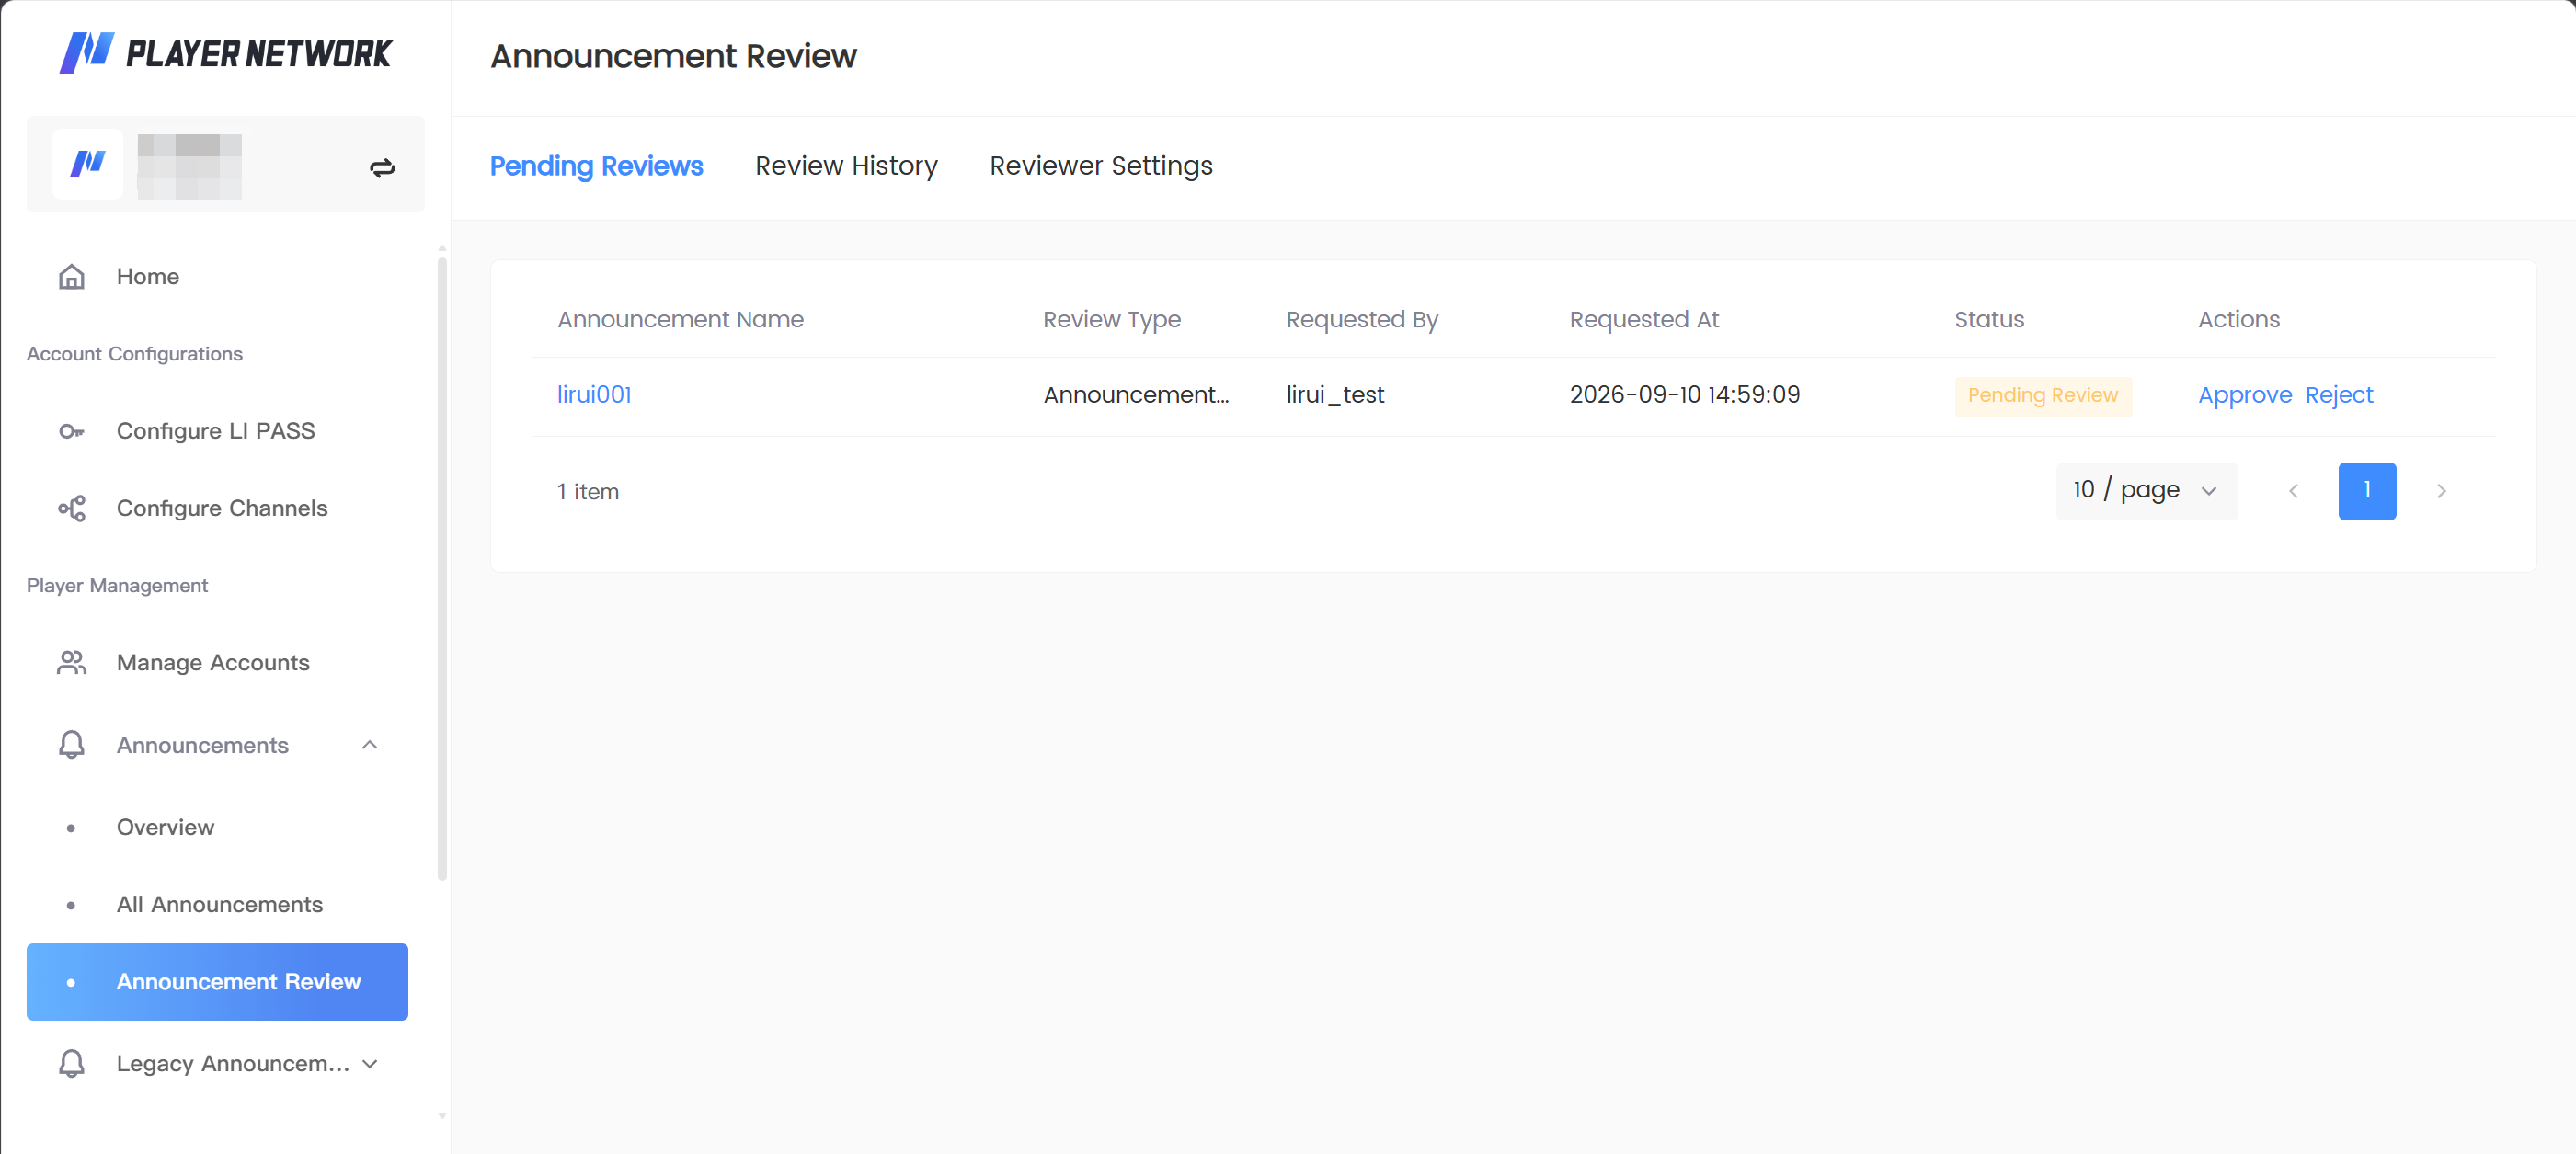
Pending review announcements
-
Go to ** Announcement Review** in the left sidebar.
-
Open ** Pending Review Announcements**.
-
Click the announcement name to view details.
-
Review the announcement content and publish scope.
-
Select ** Approve** or ** Reject**.
After approval, the announcement is published to the production environment; after rejection, the announcement returns to pending publish, and the applicant can modify and resubmit.
Review history
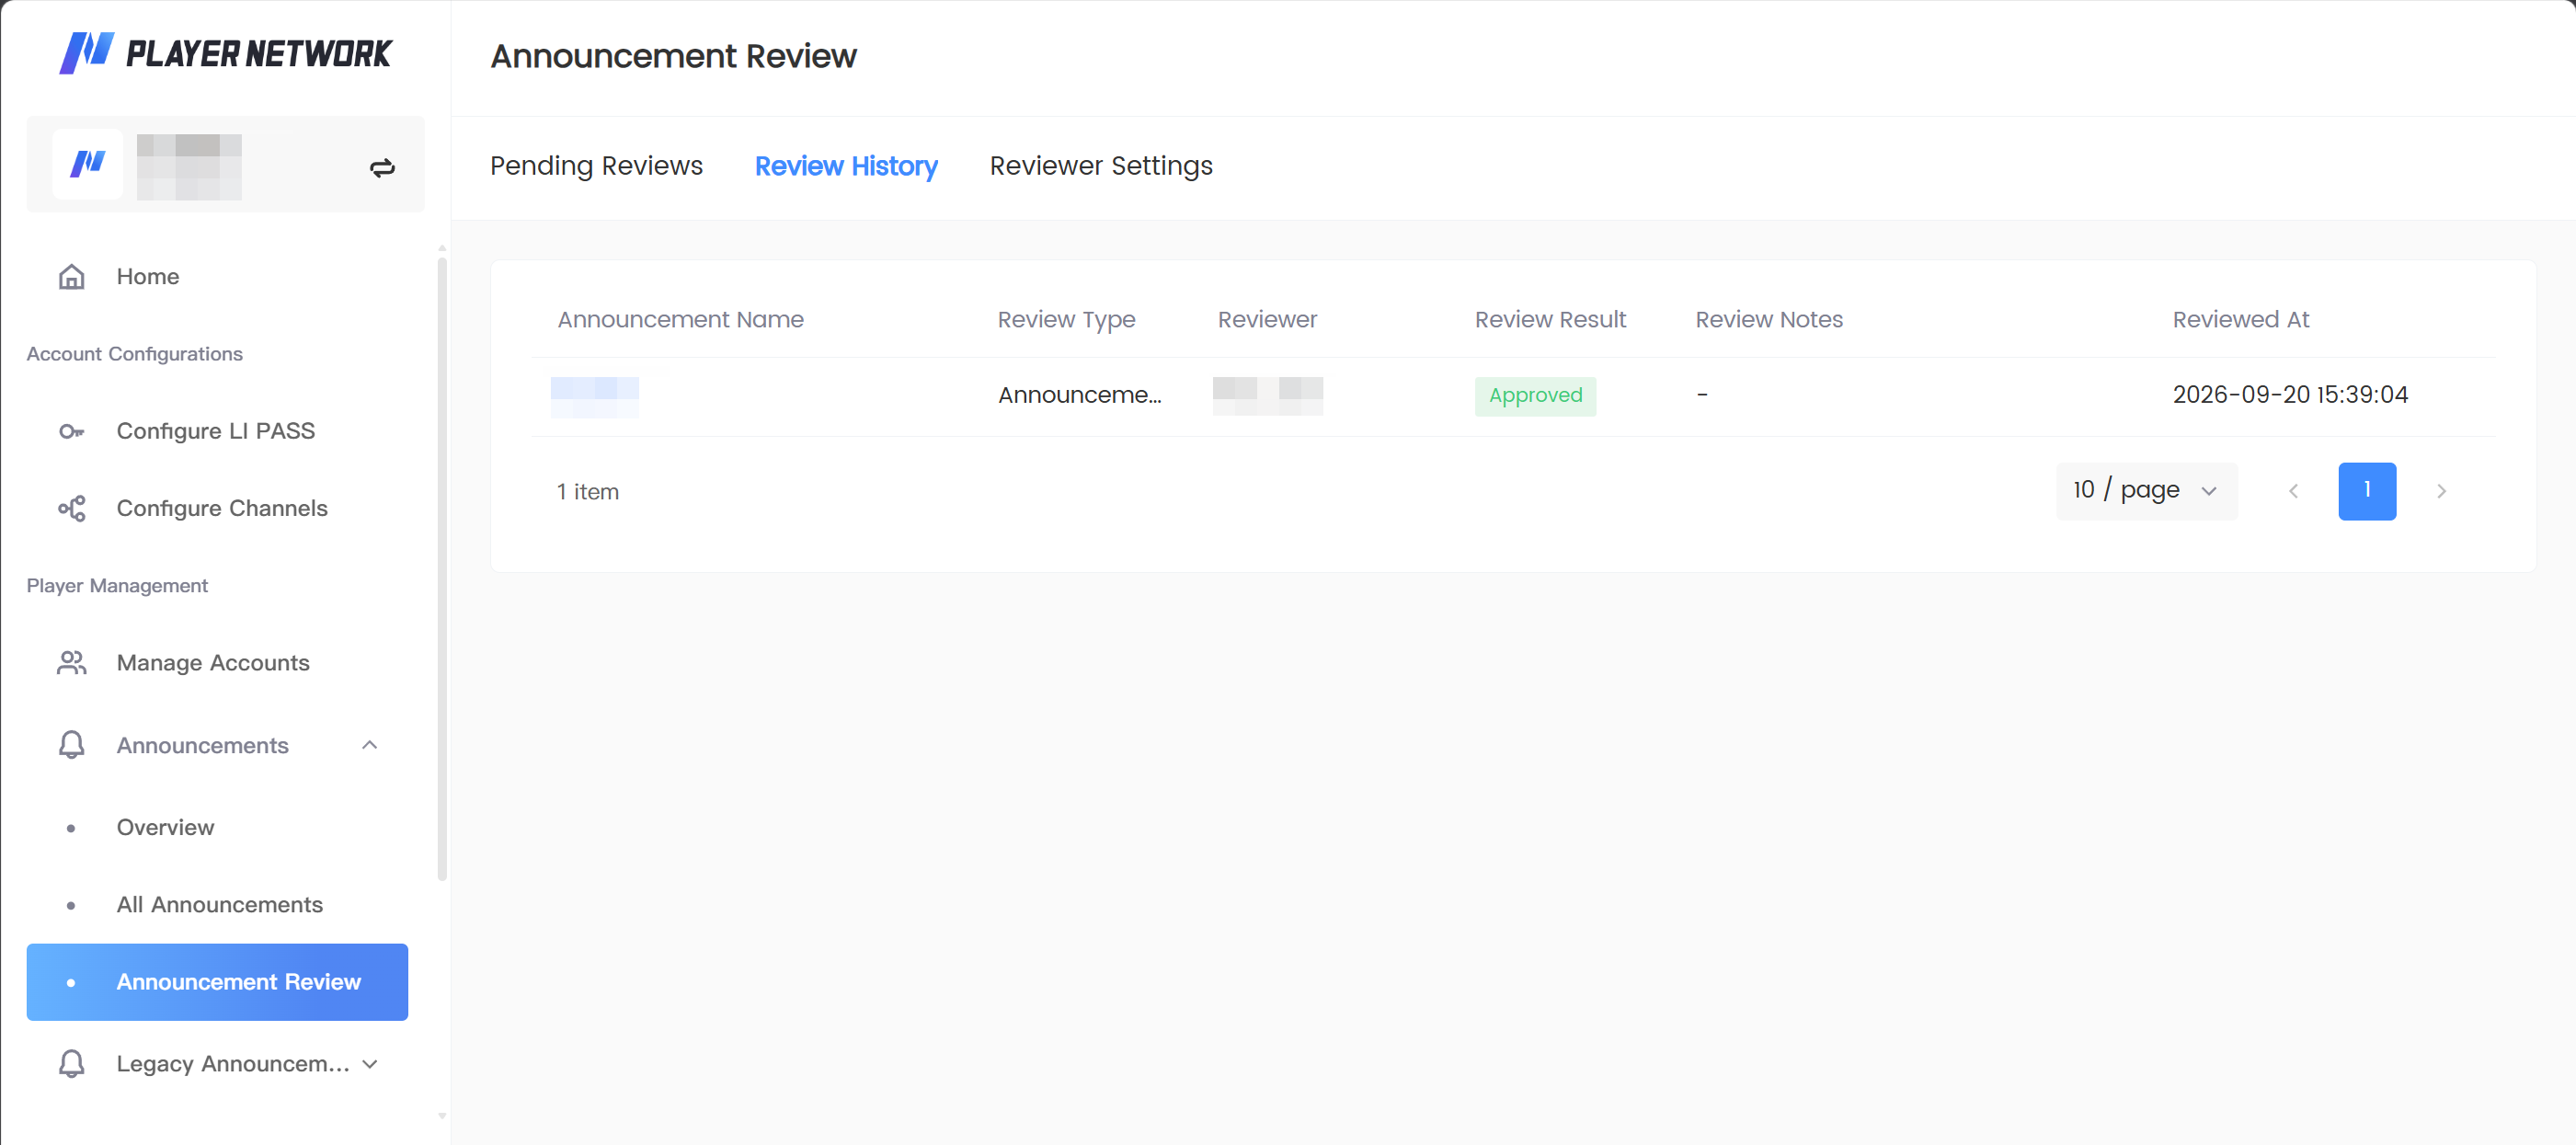
View processed publish or offline requests and their results in ** Review History**.
Reviewer settings
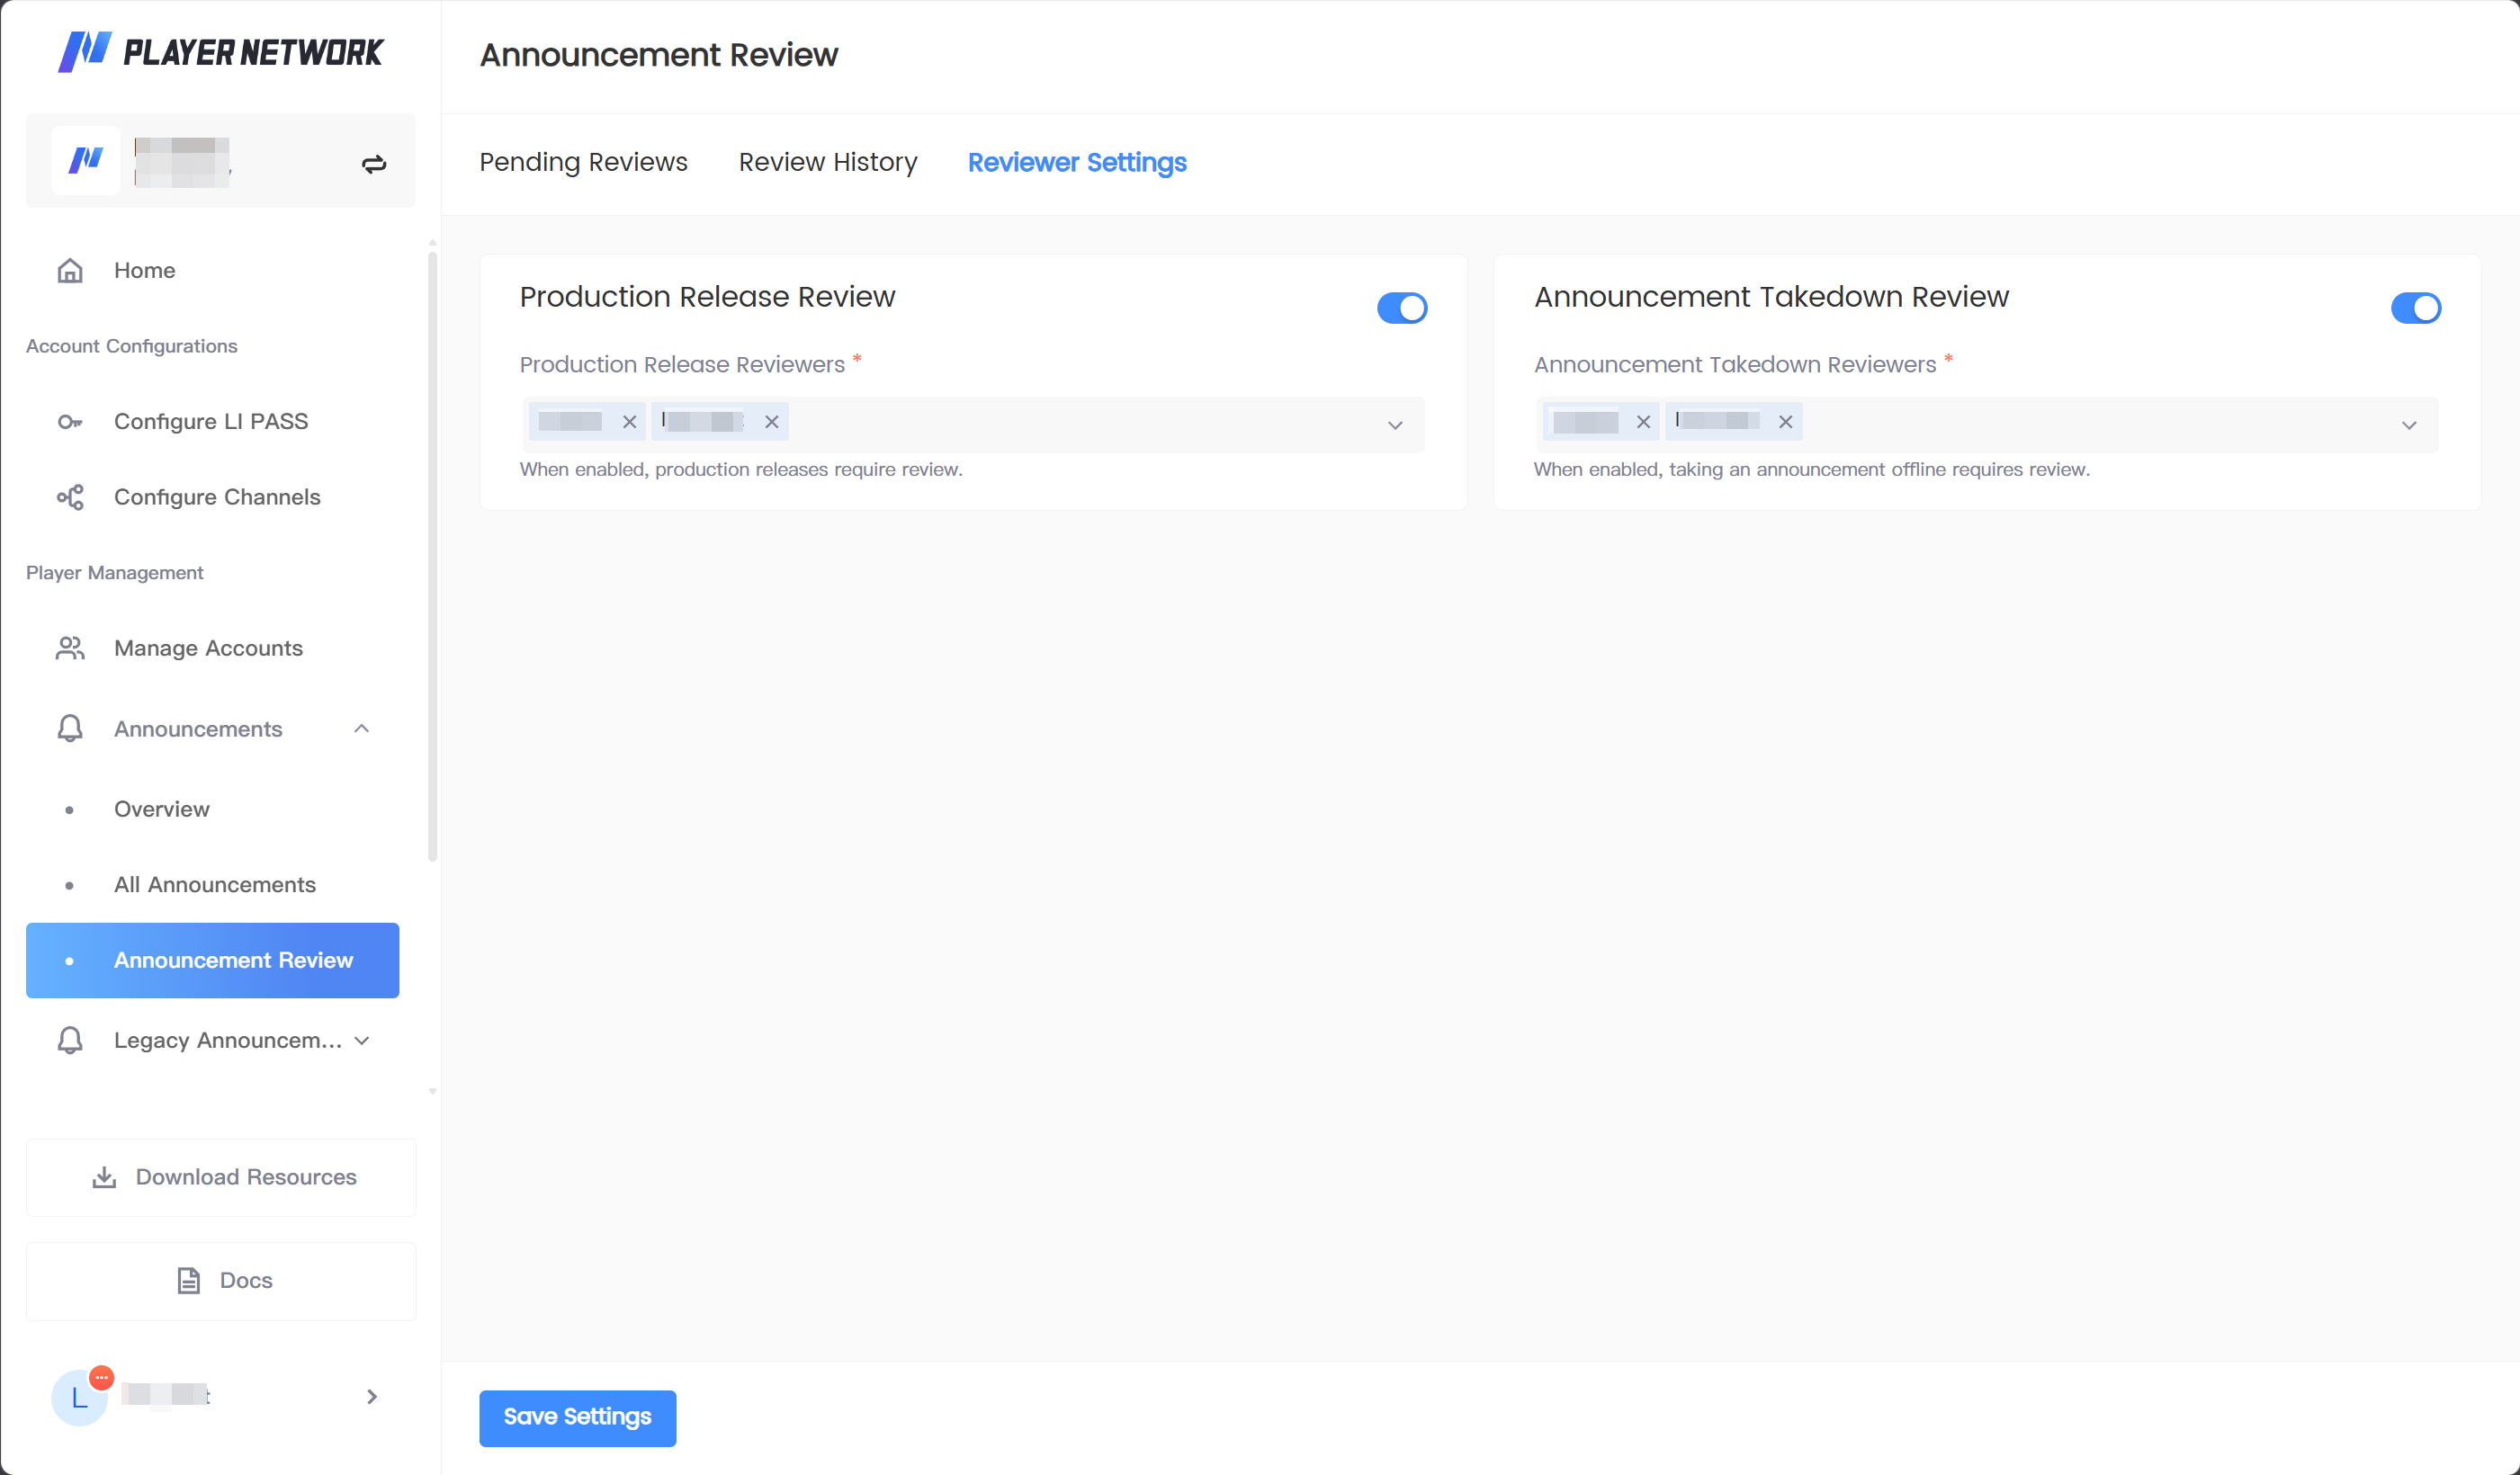
You can separately configure:
-
Whether production publish requires review, and the corresponding reviewer.
-
Whether announcement offline requires review, and the corresponding reviewer.
After turning off the review switch, the corresponding reviewer selection will be disabled. Click ** Save Settings** after modifications.
View operation logs
Entry: Go to ** Announcement List** and click ** Operation Logs** at the top of the page.
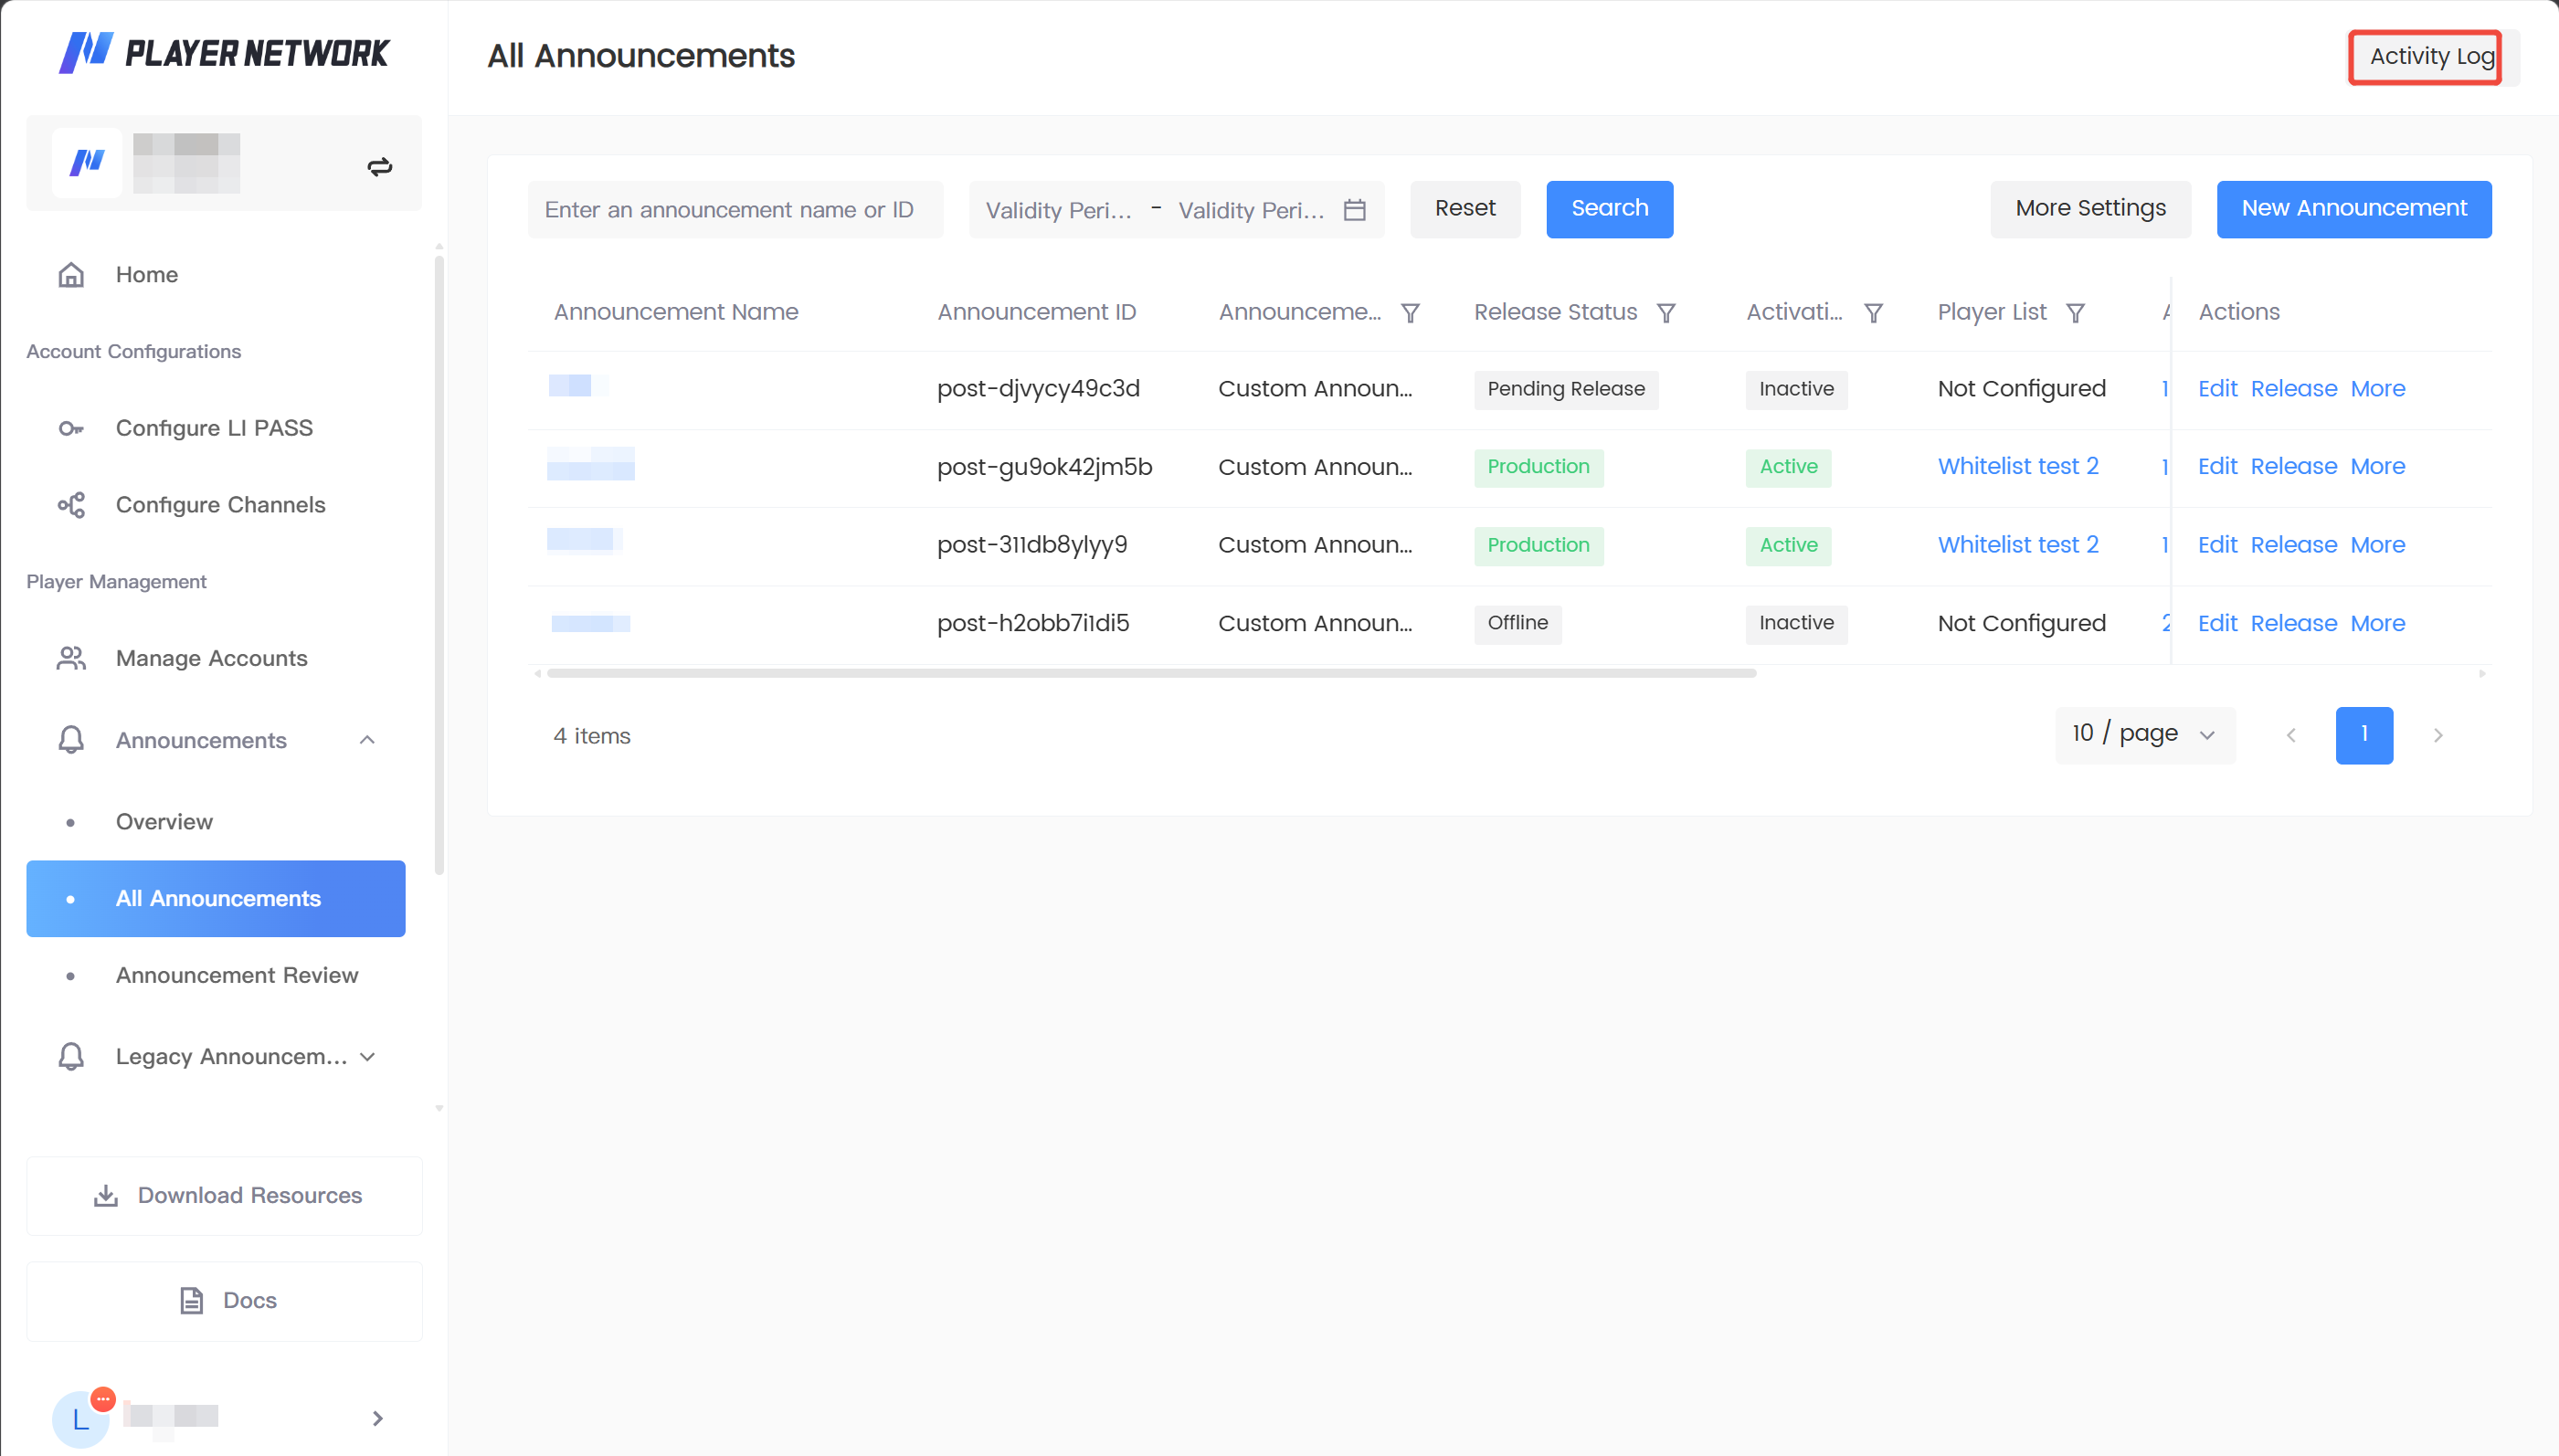
You can query by the following conditions:
-
Announcement name or ID
-
Operation type
-
Operation time
Logs cover add, edit, duplicate, delete, test environment publish, production environment publish, and offline operations. Click ** Details** to view the announcement ID, operator, time, summary, and field differences before and after the operation.
FAQ
Q1: What is the difference between announcement name and announcement title?
The announcement name is for admin query and identification; the announcement title is the content players actually see. Different languages can have different announcement titles.
Q2: Why can't the announcement type be modified?
The announcement type affects the field structure and client display. The type is locked after saving; to change the type, create a new announcement.
Q3: Why does a red prompt appear next to the title or body?
It indicates that the content exceeds the current page limit. Shorten the content according to the prompt to avoid real system validation failure.
Q4: Why is it necessary to confirm "No allowlist configured" during production publish?
When the production environment has no player list configured, the announcement may cover a large number of players in the selected region and server, so the system requires additional risk confirmation.
Q5: Why are the edit, publish, delete, or offline buttons unclickable?
Operation permissions are determined by the announcement status, validity period, and review status. Hover over a disabled button to view the specific reason.

